Content
- 1 Types of gladioli
- 2 Preparing for planting gladioli
- 3 Planting gladioli for seedlings
- 4 Preparing bulbs for planting in the ground
- 5 Planting gladioli
- 6 Gladioli care
- 7 How to properly cut and transport gladioli
- 8 Reproduction of gladioli
- 9 Cleaning and storage of gladioli
- 10 Diseases and pests of gladioli
- 11 Conclusion
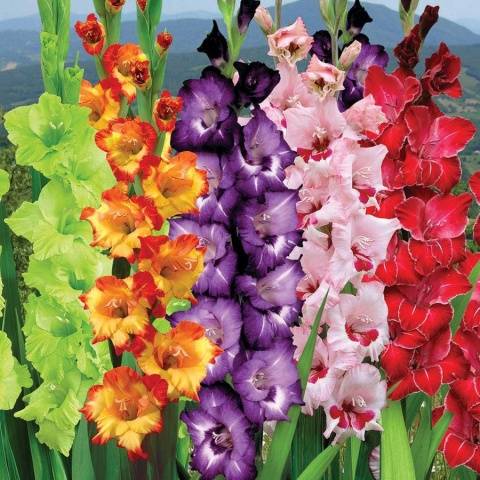
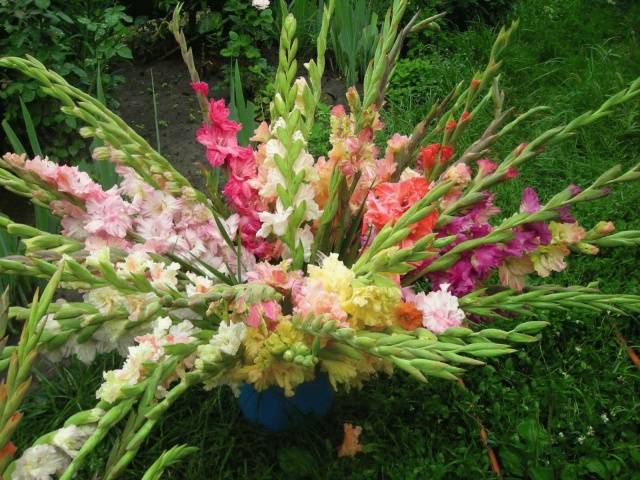
Gladioli - the most popular flowers in the recent past, which children gave to teachers on September 1. This is not surprising, because they are easy enough to grow in the garden, while they look extremely impressive: large, bright inflorescences on a high stem. To grow gladioli in Siberia, you need to make a little more effort than in an area whose climate is not so harsh.
Types of gladioli
Gladioli (also called the skewer) belong to the iris family. Today there are more than 300 species and 5000 varieties of these plants. Gladioli are perennial bulbous-tuberous flowers. Africa is considered their homeland.
All types can be divided:
By the size of inflorescences:
- small: flowers are small, located in groups along the stem;
- medium: not large flowers;
- large: large, bright flowers;
- giants: flowers reach 20 cm in diameter.
By flower type:
- smooth;
- corrugated;
- folded;
- fringed.
By color of buds:
- monochromatic: gladioli come in almost all basic colors;
- with complementary colors: for example, raspberry pink.
By arrangement of flowers:
- on the one hand in an inflorescence of the spike type;
- on both sides in spike-type inflorescences;
- spirally in a spike-type inflorescence;
- in the form of a funnel.
By flowering time after planting:
- early (includes super-early and early-middle);
- medium;
- late (there are varieties of medium-late and very late).
For growing gladioli in Siberia, the choice should be made on varieties with an early or medium flowering period, so that they have time to ripen in a short summer. It is preferable if gladioli are from domestic breeders, since such varieties are more suitable for planting in Siberia.
They have also been used as a pain reliever for toothache and as a diuretic. In the 1st century, magical qualities were attributed to gladioli: it was believed that an onion hung around a warrior's neck would save him from death and bring victory.
Preparing for planting gladioli
To prepare for planting, you should choose the right place and properly cultivate the soil.
Choosing a landing site
When choosing a place where you plan to grow flowers, it should be borne in mind that they will grow best on the sunny side in the absence of strong winds. If the plants are planted in the shade, the beginning of their flowering will shift to a later date, and the gladiolus itself will be less resistant.
If gladioli are planted in a place where there are no natural barriers to protect from the wind, you need to make them yourself. For this, herbaceous plants can be planted near the flowers, which provide a lot of greenery (for example, horse beans or beans).
Soil selection and preparation
Gladioli will not grow on swampy and limestone ground. Can be grown on both light and heavy soils. Ideal for them is loamy, with a pH of 7 (neutral) soil, rich in humus.
Preparing the soil for planting in the fall
Before digging up the ground, you can add bone meal to it: for 100 cubic meters - 5 kg. Manure must be applied to a depth of 30 cm. Organic matter is important for bulbs that have a fairly large need for humus.
If the soil is heavy, add tree leaves (not decayed) to the manure: they will prevent the earth from compaction, the soil will be looser, and more air will penetrate into it.
If the soil is too light, then it should be compacted by adding clay and fine peat to the manure, which should be well ventilated.
Preparing the soil for planting in spring
When the spring soil thaws, it should be added superphosphate fertilizer in the same amount as bone meal.
Heavy soils are plowed 20 cm deep, light sandy soils are loosened. The earth is equalized, harrowed and cleared of roots weeds.
Planting gladioli for seedlings
When growing gladioli in Siberia, it is more advisable to plant plants in the ground with seedlings - so, the flowers will have time to please summer residents with their beauty.
For training gladioli before planting, the bulbs are pre-cleaned from the shell or soaked for a day in water at a temperature of +30 degrees. Planting is done in early February.
Seedling boxes are filled with moist soil with humus (you can use sawdust), “kids” are planted and covered with soil 1 cm from above. The container is placed in a place where there is enough light. It is necessary to ensure that the ground is moist at all times.
Seedlings are planted in the ground when there are no night frosts. You should be extremely careful when transplanting: it is better not to touch the root system. For some time after transplanting, the seedlings must be protected from sunlight: the plants must be shaded. You can also cover the sprouts with a nonwoven fabric for a few days.
Preparing bulbs for planting in the ground
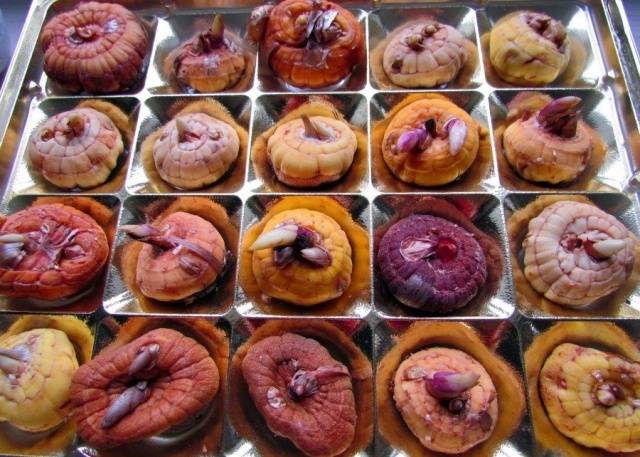
You must first remove damaged and diseased bulbs. The remaining tubers should be peeled from dry shells. Then, within two hours, the planting material is etched with mercury preparations.
If the tubers are larger or flattened, it means that they have partially degenerated: the quality of the flowers will be low, the plant will bloom later than the due date and the tubers may die during storage.
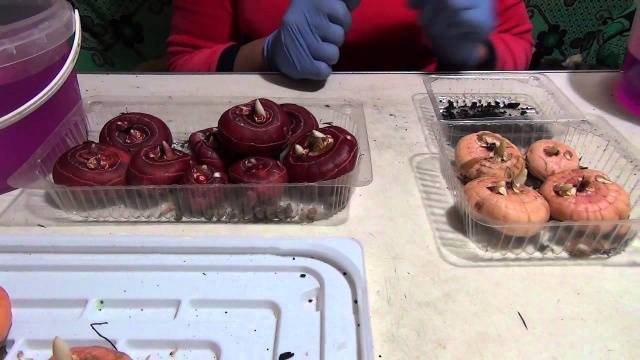
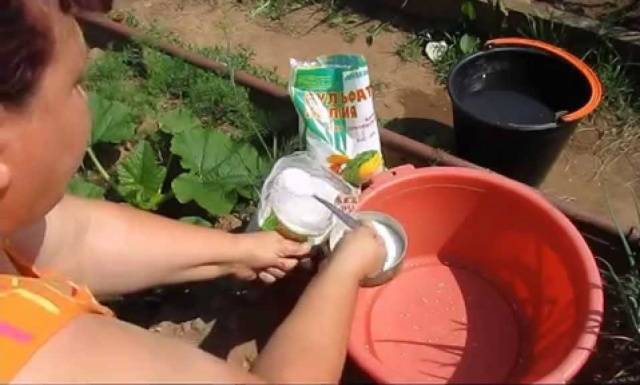
After etching, a day before planting, it is recommended to place the bulbs in a solution of trace elements for 16 hours.
The solution may contain the following substances:
- potassium permanganate;
- copper sulfate;
- zinc sulfate;
- boric acid;
- cobalt nitrate.
Planting gladioli
Plant either a replacement bulb, or "baby" obtained in the fall after digging in the tubers.
Planting a replacement bulb
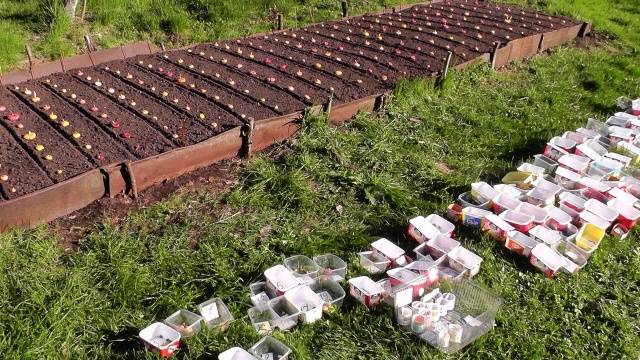
To ensure the correct planting and care of gladioli in Siberia, they begin to be planted when the soil is warmed up by at least +8 degrees. You can plant in furrows or in beds. In heavy soil, sow bulbs to a depth of at least 5 cm and no more than 8 cm, in light soil - 10 centimeters. If the land for planting is dry, water must be poured into the holes.
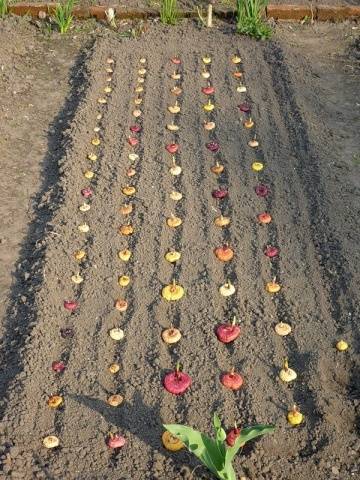
It is better not to plant tubers of different sizes next to each other: a large onion will develop earlier and will interfere with the growth of a small one. Do not forget to put a plate at the planting site with the name of the variety and the date of planting.
Landing "kids"
The "baby" should be planted to a depth of 3 cm after the ground has thawed and the soil is still sufficiently moist. To prepare gladioli for planting in spring, remove the hard shell from the bulb or soak the "baby" in water at a temperature of +30 degrees for a day. Without these manipulations, in 60% of cases, the bulb will not sprout.
Gladioli care
In order for gladioli to bloom on time and have beautiful buds, they need to be properly looked after.
Watering
After planting, until the gladioli have risen (about a month), they should not be watered so that the earth does not compact and allow air to pass through. Otherwise, the development of the root system may be disrupted.
After gladioli have risen, it is necessary to control that the soil is moderately moist (usually watering is done every three days), otherwise the ears may deform and the quality of flowers will decrease.
It is best to water with mechanical sprayers, except for the flowering period of gladioli: if water gets on the buds, they will become spotty.
Soil care
During the growth of gladioli, it is necessary to ensure that the soil is free of weeds. You also need to loosen the soil from time to time so that air can flow to the roots.
In the presence of sandy soil, after the sprouts appear, the beds need to be mulched with peat or covered with a layer of humus of 2 cm - this way, moisture will remain in the soil.
Fertilizing and fertilizing gladioli
When growing gladioli in Siberia, the use of trace elements is important. They speed up the onset of flowering by half a month, help plants defend against disease and affect the size of the buds. A solution of trace elements (the composition may be the same as when the bulbs are soaked before planting), the plants should be sprayed from the beginning of August.
In addition to fertilizers applied to the soil in the fall, it is necessary to feed the gladioli with minerals three more times:
- After a month after planting - ammonium nitrate (up to 4 kg per 100 cubic meters);
- after the development of the fourth leaf - potassium nitrate in the same dosage;
- after the appearance of buds - phosphorus and potassium in the same amount.
General rules for flower care
Gladioli need to be tied up when the inflorescences begin to show. To do this, pegs can be driven in along the edges of the bed, with the help of which a cord can be pulled at a height of half a meter - it will be more convenient to tie the plants to it.
The emerging branches of the inflorescence ears must be removed. It is also necessary to tear off the buds that have already faded. When the ear of the inflorescence has already bloomed, it should be cut off, otherwise it will contain seeds that have a bad effect on the development of the bulbs.
How to properly cut and transport gladioli
The stems should be cut early in the morning when the first bud is in full bloom. This should be done very carefully so as not to scratch the leaves. After cutting the flower, the plant should have at least 4 leaves in the garden so that the bulb can ripen and be stored for a long time.
To prepare gladioli for long-term transportation, cut plants must be placed in water for 2 hours in a cold place. It is better to cut them before the gladioli begin to bloom.
Cut flowers can stand in vases for up to two weeks. This requires changing the water in the vessel daily and removing wilted flowers. Before you put the stems in the vase, you need to shorten the leg by three centimeters.
Reproduction of gladioli
Flowers are propagated by bulbs: if you use seeds, the plant can turn out with characteristics different from the parent. After planting one bulb in the spring, in the fall it turns out up to two substitutes and several small “babies” (the quantity depends on the quality of tubers and the variety of flowers).
There are some varieties that do not produce bulbs at all or give only a small amount. To increase the number of "babies", before planting gladioli, the tubers should be cut vertically with a knife into 2 or 4 lobes so that each particle has an "eye" (shoot bud) and roots.
Each time after cutting one tuber, the knife must be treated with alcohol or another disinfectant. The place where the bulb is cut must be treated with charcoal and sulfur (mixture).
How to cut the onion correctly, see the video:
Dividing the bulbs into 2 parts does not affect the start time of flowering, and when cut into 4 parts, it shifts 14 days later.
For the rapid reproduction of flowers, "children" are planted. The disadvantage of this method is the lack of a guarantee of germination.
Cleaning and storage of gladioli
After the autumn frosts come, the bulbs must be dug up. This rule is especially true for growing gladioli in Siberia: if you leave the bulbs in the ground for the winter, they can die. To dig up the tubers, cut the stems just above the bulb.
The dug tubers must be put in a box, the bottom of which consists of a net, and rinsed with water, removing the ground. Then the bulbs are placed in gauze bags and soaked for 15 minutes in granosan (0.25% solution) or ceresan (0.35% solution). After that, the tubers are dried in the sun and ventilated.
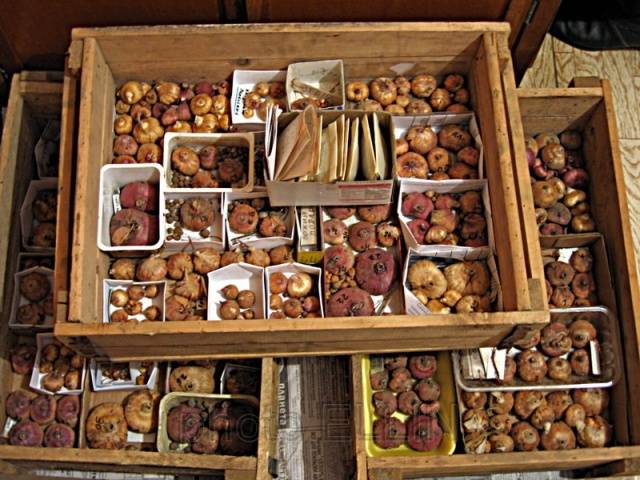
The bulbs that have dried out are put into a drawer. Do not forget to indicate the type of gladioli on the container. The boxes must be placed in a place with an air temperature of +25 to +30 for 10 days. The place should be well ventilated. The tubers should be turned over periodically. This is necessary so that roots and old bulbs can be easily separated from the total mass of tubers.
After 10 days, when the old tubers and roots are removed, the bulbs should be placed in boxes with a mesh bottom (you can put them in two rows) or in gauze bags. Sign the variety of gladioli stored in a specific container.
For about 5 days, the bulbs are stored at an air temperature of +15 to +18 degrees, on the following days the room should not be below +4 and above +10 degrees.
It is better to store boxes on shelves made of timber: this ensures uniform air circulation. It is necessary to ensure that there is no high humidity in the room where gladioli are stored, so as not to provoke early distillation of plants.
During storage of gladioli, the bulbs must be periodically inspected in order to remove diseased tubers in time.
Diseases and pests of gladioli
Like any plants, gladioli are susceptible to disease and pest attacks.
The main pests of gladioli:
- cabbage scoop: a caterpillar eating holes in flowers and leaves;
- field slug: damages bulbs and stems;
- striped nutcracker (wireworm): damages roots and bulbs;
- bear: damages roots, bulbs and stems.
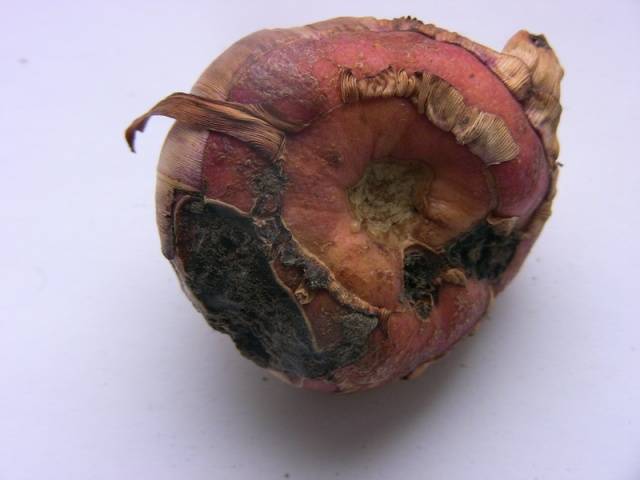
The main diseases of gladioli:
- dry rot of tubers and yellowing of gladioli;
- small spotted leaves and hard rot of tubers;
- brown (gray) rot of gladioli;
- bacterial scab.
Prevention of diseases of gladioli
To reduce the possibility of gladioli diseases, the following conditions must be met:
- Dressing the bulbs before planting.
- Do not plant flowers in the same place until 5 years have passed.
- The distance between the planted gladioli should be large enough so that diseased plants cannot infect healthy ones.
- Proper care of gladioli.
- Timely harvesting.
- Proper storage of bulbs.
- Making the correct feeding in the required amount.
- Twice a month, during the growth of flowers, gladioli should be treated with Bordeaux liquid (1-2%) or Zineb solution (from 0.70% to 0.75%). You need to add casein glue to the composition at the rate of 20 gr. for 10 liters or wheat flour 50 grams for the same amount of liquid.
- Infected plants should be dug up and burned to avoid spreading the disease to healthy flowers.
Conclusion
If the conditions for proper planting and proper care of gladioli are met, a good harvest of these bright, beautiful flowers can be grown in Siberia. In addition, gladioli contain a huge amount of vitamin C: the same amount as in rose hips. By drying the leaves in the summer, and brewing them in the winter, you can avoid vitamin deficiency and colds.


