Content
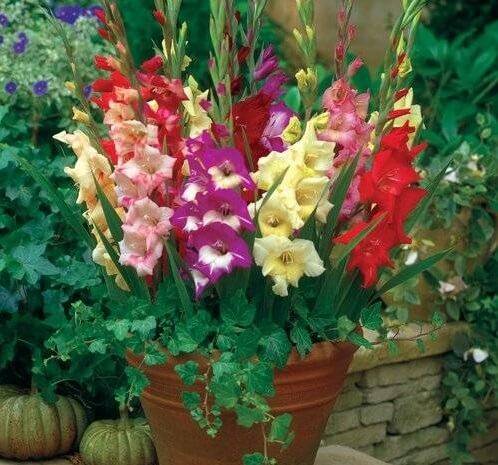
Flowers with bulbs do not have to be planted outside in a flower garden. So gladioli are often found in places where no one expects. Many skewer lovers have flowers in pots on windowsills and right on the street.
The green leaves of gladiolus resemble a knight's sword, it was for them that the flower was called the sword. Flowers are delicate, graceful with a varied color palette. Today there are a huge number of gladioli varieties that are appreciated by amateurs for their long flowering in the cut.
Attention! To grow a gladiolus in a pot, you need to follow special rules. We will talk about them today.
A few words about gladioli
In nature, gladioli grow in the Mediterranean and in the African subtropics. They need soil rich in nutrients and warmth. Cold wind can kill the plant.
Warning! In one place, gladiolus bulbs can only be grown for two years.
When growing gladioli in a room, a decorative ornament is obtained, but only if there is enough soil for full development. When asked if gladioli can be planted in pots, the answer is unequivocal - yes.
Growing a skewer in a pot has its own characteristics:
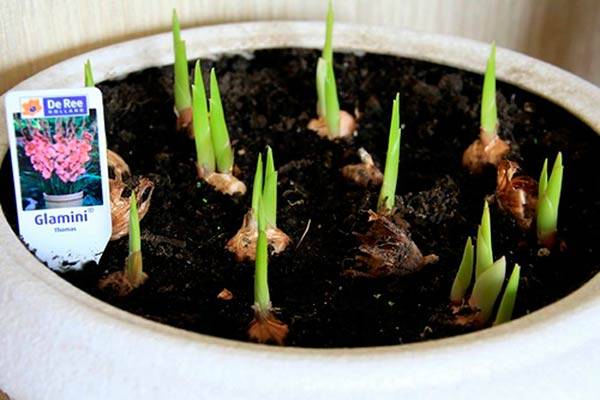
- Several bulbs are planted at once to obtain a lush bouquet.
- Compliance with agrotechnical procedures regarding the rules for caring for bulbs and plantings is required.
Russian breeders have created mini-varieties, the height of which varies between 30-50 cm. Flowers are also smaller than usual, but the color of these regal plants is very diverse. Gladioli grown in pots are in no way inferior to those planted in the ground. You can see for yourself by looking at the photo.
Landing rules
The method of growing gladioli in pots is not new. It was used by the ancient Greeks. Let's figure out the features.
Preparing the container
Before starting planting gladioli, you need to decide on the choice of capacity. Usually this is a pot that is at least 40 cm deep and 20 cm in diameter or slightly more. This will allow the gladioli bulbs to thrive.
Flowers suffer if moisture stagnates in the pot, so drainage holes must be made in the bottom to drain the water. Broken shards, small stones or pieces of glass can be used as drainage.
Which soil to choose
Soil is poured over the drainage. It is necessary to plant gladioli in loose, structured soil. It absorbs water well. Florists often use ready-made compositions for indoor flowers.
If the soil is being prepared on its own, you need to choose fertile, black earth. Loam is also suitable, only coarse sand will have to be added to it. It is pre-washed under running water. The height of the soil should be at least 30 cm for the root system to be comfortable.
The soil is first spilled with boiling water, adding a little potassium permanganate. Such processing is necessary to destroy the spores of fungal diseases. You need to add a little wood ash to the soil, it serves as a top dressing.
Features of planting bulbs
To plant gladioli correctly and ensure their full development, you need to take into account the planting depth of the bulb. This parameter directly depends on the diameter of the planting material.If there is loose soil in the container, then the bulb is deepened by 4 of its diameters. On heavy soils, the sowing depth is three diameters. A distance of 5-6 cm is kept between the bulbs.
Preparing planting material
As a rule, bulbous plants are planted in April-May. But some growers start planting gladioli in March if the bulbs woke up earlier.
In this video, experienced flower growers will share how to prepare gladiolus bulbs for planting in pots:
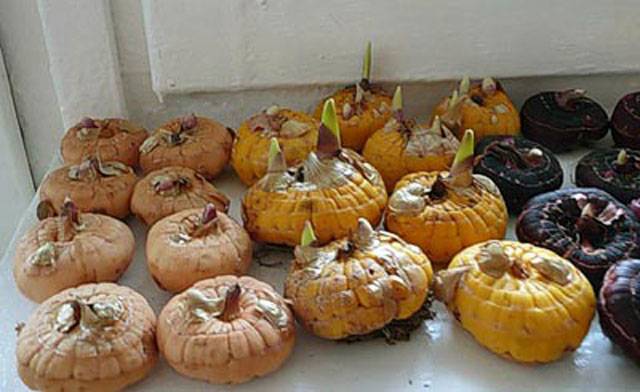
Before planting gladiolus in pots, each onion is peeled from the husk. This must be done carefully so as not to damage the sprouts. Bulbs with dark spots, dried out are subject to rejection. In some cases, the planting material can be reanimated. Small damages are cut out and smeared with brilliant green, fungicide solution or sprinkled with crushed charcoal.
Bulbs with a diameter of 3-5 cm (as in the photo below) are the best planting material. They will give powerful peduncles, there will be many flowers on them.
How to process the bulbs
The bulbs should be treated with pests before planting. For these purposes, you can use different methods:
- soaked in a solution of potassium permanganate, Bordeaux liquid or copper oxychloride;
- use drugs "Maxim", "Fundazol", "Aktara", "Karbofos", taking into account the recommendations;
- treated with "Dichlorvos", putting the bulbs in a plastic bag. The bag is tied and the bulbs are kept for half an hour.
Features of planting gladioli in pots can be seen in the video:
Care rules
The first step to getting a blooming bouquet of gladioli is done. Now you need to understand the features of pot growing.
Watering
Gladiolus is capricious about the moisture content of the substrate. The slightest drying out of the soil has a negative effect on the development of the skewer and can cause death. But you should not overmoisten the soil either: the bulb will begin to rot. Watering gladioli should be moderate in order to avoid curvature of the peduncles, a decrease in decorativeness.
Watering will depend on the ambient temperature and humidity. In the heat, you need to moisten the plant at least 3 times a week. To increase the moisture resistance of the soil, experienced flower growers advise mulching it with peat or humus.
Top dressing
The rules for caring for flowers planted in pots involve feeding. In order for gladioli to please with beautiful, lush inflorescences, you need to carry out root and foliar dressing with complex fertilizers:
- The first time they make a top dressing is when the third leaf appears on the gladiolus.
- Fertilize the second time with six skewers.
- When the gladiolus throws out the peduncle, it needs to be fed a third time.
How to avoid deformation of peduncles
The peduncles of gladioli, although powerful, are quite long. They cannot be held in an upright position due to the severity of the flowers; they often break in the area of internodes. One of the reasons is insufficient, one-sided lighting.
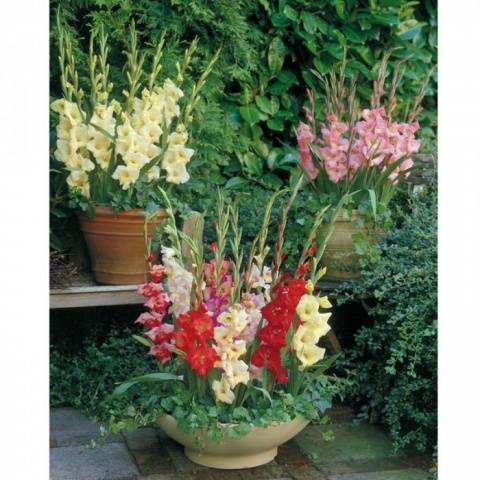
There are usually 5 to 6 bulbs in a pot, and a whole bouquet forms when blooming. To prevent deformation of the plants, they are tied to pegs, but they spoil the appearance of the flower garden.
Advice! It is best to use a decorative openwork mesh. Then our gladioli will resemble a bouquet in a package.
Growing conditions
Each grower has many tricks for growing gladioli in pots, they are always happy to share them with beginners.
What you need to know:
- Gladiolus is a sun lover. If the flowers are in the apartment, with the onset of heat, the pots are taken out to the balcony. There is enough lighting and heat. In summer, containers with planted gladioli are put out on the street.
- Gladioli bloom better if direct sunlight does not bother them, so the best place for pots on the site is partial shade.
- In the apartment, they choose a southern window, shade if necessary. Air humidification is necessary to create a comfortable environment.You can spray water from a spray bottle or place trays filled with moss next to blooming gladioli. This plant perfectly retains moisture and gradually releases it into the air.
Pest control
As you can see, if you make an effort, you can always grow gladioli in pots. Fortunately, there are not so many pests living on the skewer. First of all, thrips. These are small creatures, their appearance can not always be immediately noticed. Insects suck out juices, multiply very quickly. Thrips can be destroyed with pesticides. Bothers the flowers of aphids. Sometimes it is enough to sprinkle the flowers with tobacco dust.
Flowers planted outside in pots can suffer from slugs eating away the juicy parts of wedge-shaped leaves, flowers, and stems. The decorativeness of the flower is lost. But that's not the worst slug threat yet. If they get to the tubers and roots, the plant dies.
Slugs threaten gladioli grown in flowerpots on the street. They multiply where there are weeds. Therefore, you need to mercilessly fight them not only in the pot itself, but also around it.
Receiving planting material
When growing gladioli in pots, do not forget about the formation of future bulbs. They will be required for planting next year. To do this, after the gladiolus has faded, the peduncle is cut off.
After some time, they themselves will dry out. Watering and feeding are carried out as usual. After the leaves are completely dry, they are cut off along with the stem, and the pot of bulbs is stored in a dark, cool place. If the plant was grown outdoors, then the container is brought into the room before the start of frost.
At the beginning of October, the bulbs are removed from the container, shaken off the soil, and examined for the presence of pests. If at least one is seen, all planting material is treated with chemicals as a prophylaxis.
After that, the bulbs must be placed on a sunny windowsill so that the scales dry. When they rustle in their hands, the planting material is removed for storage. Some growers store them in containers in the refrigerator.
In the village, planting material is perfectly preserved in the basement. Only each onion needs to be wrapped in several rows of newspaper, as in the photo. If potatoes are stored nearby, they moisturize the air while breathing.
Important! The newspaper will absorb excess moisture, it will not damage the gladioli bulbs.
Conclusion
As you can see, growing gladioli in pots is a fun process. Imagine: it is still cold outside the window, uncomfortable, and in your apartment on the window there are whole bouquets of multi-colored gladioli. Many growers plant bulbs of different varieties in one container. Try it yourself, you won't go wrong!


