Even before starting the construction of a barn, you need to decide on its purpose. The utility unit for storing inventory can be made cold with thin walls. If it is planned to build a barn for the winter, where the bird or animals will be kept, then you need to take care of the insulation of the room.
How to build a warm barn correctly
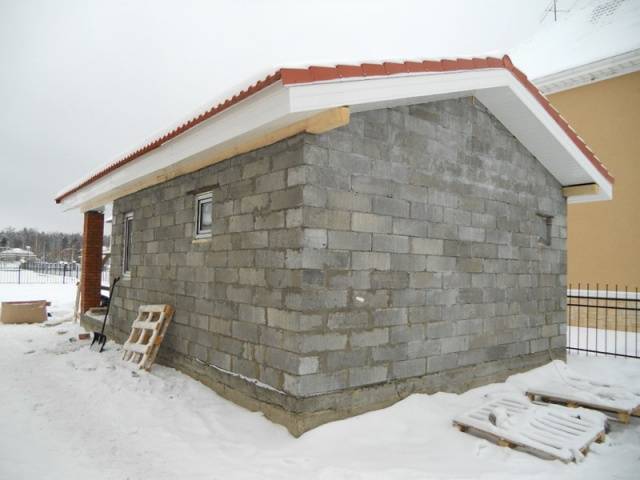
When building a winter shed, it is advisable to immediately select materials that have good thermal insulation characteristics. It is optimal to build walls from timber, foam blocks or aerated blocks. These materials keep heat inside the room so well that there is no need to use thermal insulation. The only drawback is the considerable financial costs.
You can build a winter shed with minimal cost, but you have to work hard. Mixing cement with sawdust or small shavings makes great wall blocks. They are called arbolite. The benefits of making such a material are obvious:
- The small weight of the blocks allows you to erect walls on a lightweight foundation;
- Wood shavings have excellent thermal insulation properties, so there is no need for additional wall insulation;
- The cheapness of the material. The shavings can be taken free of charge at any sawmill. You only need to buy cement, and its consumption is only 10% of the mass of wood waste.
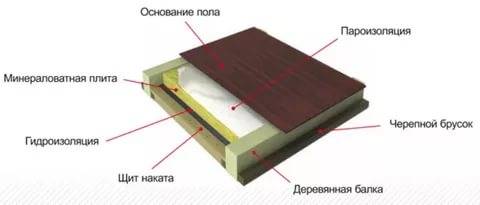
It is better to make the floor of the winter shed double from a board with a lining of thermal insulation. It is imperative to provide for an insulated ceiling. It is also important to consider one rule. All winter sheds intended for keeping poultry and animals are made with low ceilings. It is easier to heat such a room, and the heat evaporates from it more slowly.
In the video, the thermal insulation of the farm building:
Turning an old cold barn into a warm room
When there is already a ready-made shed in the yard, but it is old and cold, then it should not be disassembled. It will be cheaper to reconstruct the building. Indeed, during disassembly, most of the building material will become unusable. Now we will look at how to insulate a barn cheaply, but reliably, so that it can be used in winter for keeping poultry.
Making double walls from a board
So, on the site there is an old wooden shed with large cracks on the walls. They need to be patched first. To do this, take a board with a thickness of 15-20 mm and nailed on all four walls. If the cladding takes place from the outside, then the fastening is performed horizontally with an overlap. The edge of the top board should go over the bottom board. You will get a kind of Christmas tree. Water in any heavy rain will not be able to penetrate under the skin.
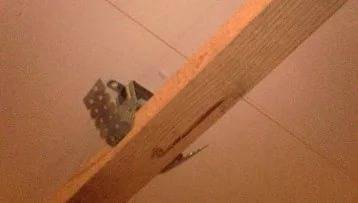
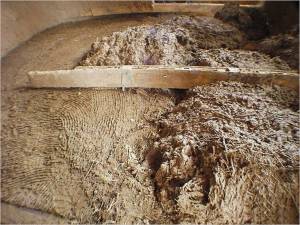
From inside the room, sheathing racks are nailed vertically to the walls. In the future, the gap between the two walls will be filled with sawdust at least 20 cm thick, therefore, the width of the lathing elements must be taken the same. However, finding a 20 cm wide board is difficult and expensive. It is easier to take the slats and fix them to the wall with hangers at an appropriate distance.
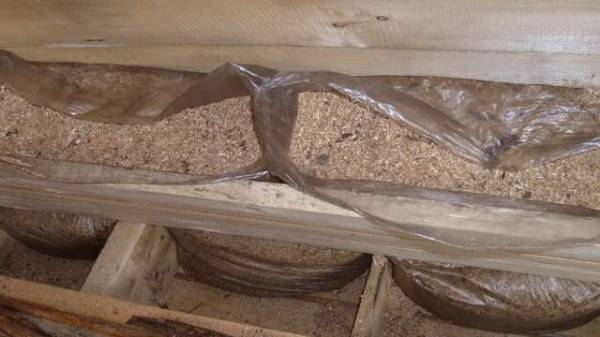
Next, proceed to the wall cladding. Boards are nailed to the crate, starting from the floor. It is better to place sawdust between the casing in plastic bags. The film will protect the insulation from dampness.To make it convenient to do, the number of boards on the wall is nailed as much as needed to form a pocket along the height of the bag.
So, the first pocket for the entire length of the wall is ready. An empty bag is alternately inserted into the gap, after which it is pushed tightly with sawdust. After filling, the edges are sealed with tape. There should be no gap between the bags of sawdust, otherwise the work will be useless.
When one row is ready, another board is sewn on until a new pocket is formed. The process is repeated until all walls are insulated. Under the very ceiling, you will first have to fix the sawdust bags on the wall, and then press them down with sheathing.
Wall insulation with shingles
An old, reliable and proven method is to insulate the wooden walls of the barn with shingles. The costs are practically zero. You only have to buy a thin rail. If there is no money for this material, then you can cut thick rods from a vine or willow.
So, we insulate the winter shed according to the old-fashioned method:
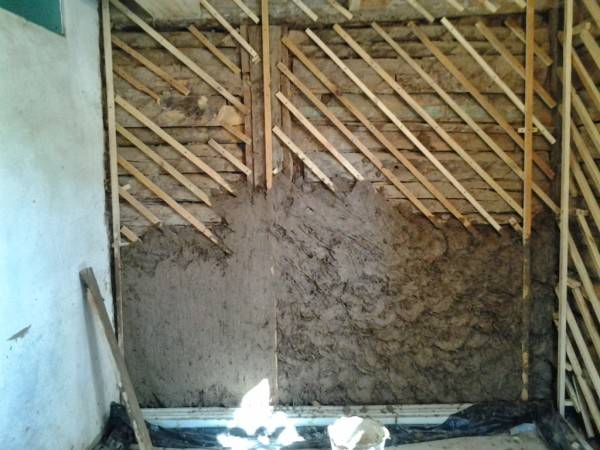
- The slats are nailed obliquely to a wooden wall from the inside of the barn. For reliability, you can nail the second row from the top, only diagonally in the other direction. Then you get rhombuses on the wall.
- After sheathing all the walls with shingles, they begin to prepare the solution. The clay should already be soaked two days before starting work. Now you need to add wood shavings or straw to it, and then knead thoroughly.
- The finished solution is poured over the shingles with a trowel, starting from the bottom of the wall. Nailed slats are a kind of beacons. Guided by them, approximately the same thickness of the solution is applied to all the walls of the winter shed.
- After applying the plaster, the walls are allowed to dry. Many cracks are bound to appear. For their grouting, a solution of clay with sand is thrown in in a 1: 2 ratio. When the dried walls of the barn remain without a single crack, they begin to whitewash with lime.
This old method of insulation is very laborious, but it is considered the cheapest.
Thermal insulation of the walls of the barn with purchased materials
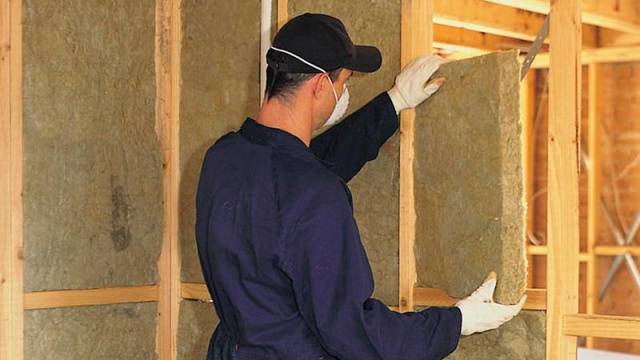
If severe winters are observed in the region, you need to approach the insulation of the walls of the barn more seriously. For these purposes, purchased thermal insulation is used. You can use polystyrene, but rodents love it, plus the fire hazard of the material and other negative qualities. Mineral wool is ideal for wooden shed walls. It is better to refuse roll material because of its possibility of caking. It is optimal to give preference to basalt wool slabs.
The work begins with securing the lathing, but first the wall is covered with waterproofing material. It will protect the insulation from moisture. As a lathing, you can simply nail slats vertically to the wall with a width slightly larger than the thickness of the insulation. Basalt slabs are placed inside the resulting cells, starting from the floor of the barn. They must be sunk by at least 1 cm in order to create a ventilated gap between the thermal insulation and the wall cladding. When all the cells are laid, the insulation is closed with a vapor barrier. To prevent the slabs from falling out of the cells, they are fixed with wooden planks.
Now all that remains is to nail in the sheathing material. A regular board, wooden lining or plywood will do.
Arrangement of warm floors in a barn
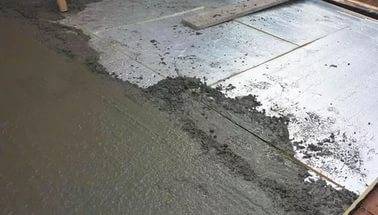
Of course, the "warm floor" system in a winter shed is rarely found, since it is very expensive. We will also insulate the floors with a simple method. If the old wooden shed just stands on the ground, the floor level inside must be raised by 10-15 cm. For this, a sand embankment is made. It will be good to add expanded clay, if available. Now you need to mix a lot of clay mortar with sawdust. Pouring the floor of the barn begins from the far wall, moving towards the exit.
It is advisable to fill in a layer with a thickness of at least 10 cm.When the screed dries, cracks may appear on the surface. For their grouting, a liquid clay solution is prepared. The surface of the floor can be simply wiped down with a rag. The main thing is to constantly add liquid clay so that the solution penetrates into the cracks.
If the shed is built on a strip foundation, the capital insulation of the floor begins from the blind area. To do this, a trench is dug around the base of the building, where expanded polystyrene, closed on both sides with waterproofing, is laid. The same insulation is attached to the basement, after which a screed is poured around the foundation or a crushed stone blind area is poured. Inside the shed, waterproofing is laid on the floor, then expanded polystyrene and waterproofing again. A concrete screed is poured from above.
IN frame sheds, installed on a pile or columnar foundation, make a double floor from a board or OSB. The gap between the lags is filled with polystyrene, mineral wool, or simply covered with expanded clay. It is important not to forget to lay the waterproofing under the insulation, and cover it with a vapor barrier on top.
We insulate the ceiling of the barn
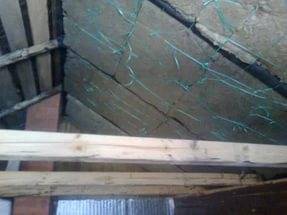
In a winter shed, it is imperative to insulate the ceiling. This is where most of the heat goes. If it is not there, then you need to nail a board, plywood or OSB onto the floor beams from below. On top of the lining from the attic side, a vapor barrier is laid, and then any insulation. Here you can save money. Straw, gravel, sawdust have excellent thermal insulation properties. Any of these materials can be simply scattered between the beams.
In the video, ceiling insulation with sawdust:
Insulation of doors and windows of a winter barn
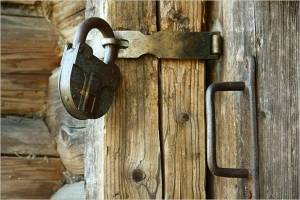
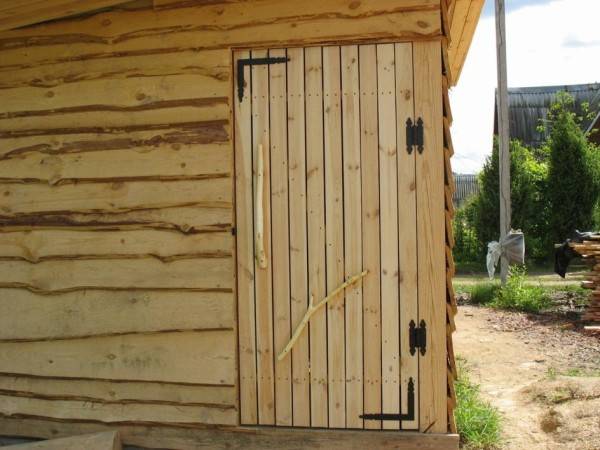
Often the door of a rural barn looks like the one shown in the photo. That is, a board made of boards with large slots hangs on hinges. This is unacceptable for a winter shed. First, the door must be hung on reliable hinges, because after insulation it will become heavier.
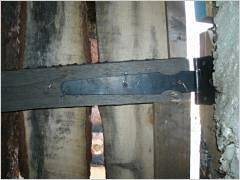
Further, from the outside along the perimeter of the door, a rail is nailed. 2-3 jumpers are placed inside the frame to form cells. This is where the mineral wool should be laid. From above, the insulation can be sheathed with a board, but the door will become heavy. When it rains, this sheathing will let water through. In addition to the fact that the insulation is saturated with moisture, the structure will become even heavier, and can even tear out the hinges. Outside, it is better to sheathe the door with a sheet of corrugated board, and from the inside of the shed, you can close the gaps between the boards with fiberboard or thin plywood.
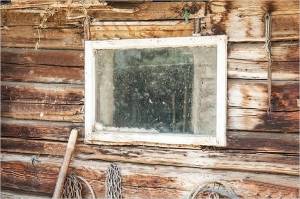
To reduce heat loss through the windows, two glass panes are installed in the winter shed. Moreover, it is advisable to stick them to the frame on silicone or any putty. If there are cracks around the window, they can easily be caulked with tow, and the platbands can be nailed on top.
Outcomes
Having carried out the insulation of all elements of the barn, the outbuilding can be used in winter. In severe frosts, poultry or animals are warmed up with an infrared heater.


