Content
- 1 What the owner of the garage should take into account before starting the construction of the cellar
- 2 Types of basements under the garage
- 3 Choosing the right material
- 4 Preparation of the pit, floor and foundation
- 5 Walling
- 6 Overlapping the cellar and its insulation
- 7 Arrangement of ventilation in the basement
Cellars can be conditionally divided into two types: free-standing structures and storage under the building. The first type of basement is acceptable for owners of private yards, since a city dweller does not have the opportunity to build it near an apartment building. The second type is suitable for all people. Even in urban conditions, the storage can be placed under the balcony of the first floor. But if there is a garage available, then it is the best place to organize a basement. Now we will look at how to make a cellar in the garage with our own hands, we will touch on all the nuances of the choice of material, as well as the correct internal arrangement of the storage.
What the owner of the garage should take into account before starting the construction of the cellar

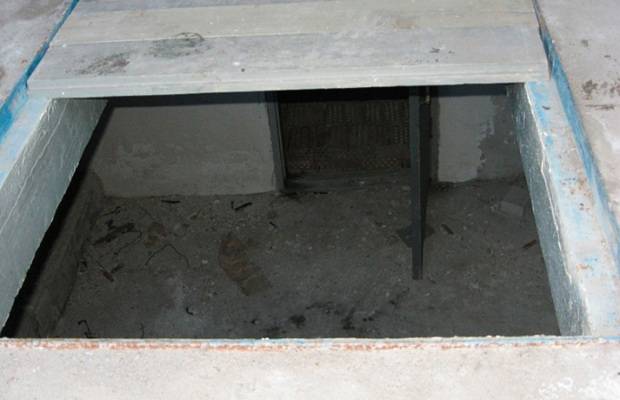
The photo shows an example of a diagram of a garage with a basement. Approximately the same drawing must be sketched on paper in order to calculate the required amount of building materials. On the diagram, it is necessary to display all the dimensions of the cellar, the location of the entrance, the exit points of the ventilation pipes and the entry point for the artificial lighting cable. As for the dimensions of the storage, there are standard requirements for them, in which the depth is 1.8 m and the width is 2.5 m. However, these standards are not always adhered to.
When determining the dimensions of the pit of the cellar, it is important to ensure that the basement does not cause the destruction of the load-bearing elements of the garage. In such a structure, the basement ceiling is the garage floor. Here it is necessary to calculate its strength, select the optimal materials for the overlap, and do not forget about waterproofing.
The arrangement of the cellar is a personal matter of each person, however, for review, you can consider several requirements:
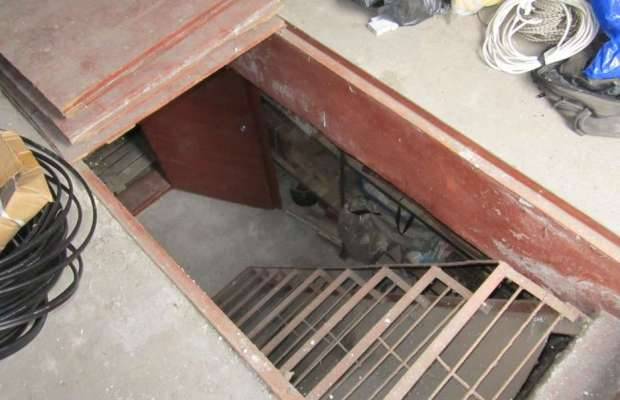
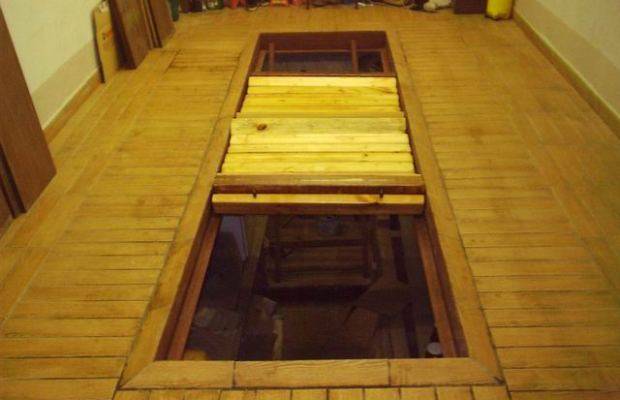
- A simple ladder is usually used to descend into the cellar under the garage. It is lowered through the entrance hatch.
- The option of installing a stationary metal staircase or ebb concrete steps is suitable for a cellar in a large garage. Here we must take into account that such a descent will take up a lot of free space in the basement.
- The manhole cover is made of durable but lightweight material. It must withstand the weight of a person, if the owner suddenly steps on it, and also freely open to the side without making any special efforts.
Taking these recommendations into account, it will turn out to dig a comfortable cellar with your own hands under the garage.
Types of basements under the garage
Several types of cellars can be built under the garage, but they all differ only in their depth. We have already talked about the standard indicator. In practice, basements are dug with a depth of 1, 6 to 3 m. In such a self-built cellar, you can store any stocks of food. Such a structure belongs to a completely buried type of basement.
Less popular are semi-buried storage under the garage. Their depth is a maximum of 1 m. A ground basement is very rarely set up. For him, a small pit is dug on the floor of the garage, where a plastic container with a lid is installed.A semi-buried and above-ground cellar is appropriate if high-lying layers of groundwater do not allow digging a completely buried basement.
A recessed type of cellar is arranged under a large capital garage. After all, building such a basement under a temporary structure is stupid. In the future, it will not be possible to transfer it when moving the garage to another location. The dimensions of the buried storage are determined by the owner at his own discretion. Most often, it is dug up to a depth of 2 m and a width of 2.5 m. When drawing up a project, it is important to think about how to insulate the cellar in the garage so that conservation and vegetables do not freeze in winter.
It is best to start the construction of a buried storage facility even before the construction of the garage begins. We'll have to dig a large pit, and for this it is better to use the services of an excavator. If the garage has already been built, the basement construction technology remains the same, only the hole will have to be dug manually with a shovel.
If the choice still fell on a buried cellar, then you need to think over the important points again:
- In the relevant authorities, you need to find out if it is possible to dig a hole up to 3 m deep on the site where the garage is built.This is especially important for urban areas, where a huge number of different cables, pipelines and other communications are intertwined underground.
- A completely buried cellar, together with the garage foundation, must have reliable waterproofing from groundwater. Usually, integral protection can be organized only when both objects are erected at the same time. It can additionally include a drainage system that removes groundwater from the facility. If the garage has already been built, it is not always possible to perform reliable waterproofing of the basement. This threatens to undermine the foundation, and the destruction of both buildings.
If all these requirements are feasible, you can safely proceed with the construction of a buried cellar. In the final, we will give some useful tips:
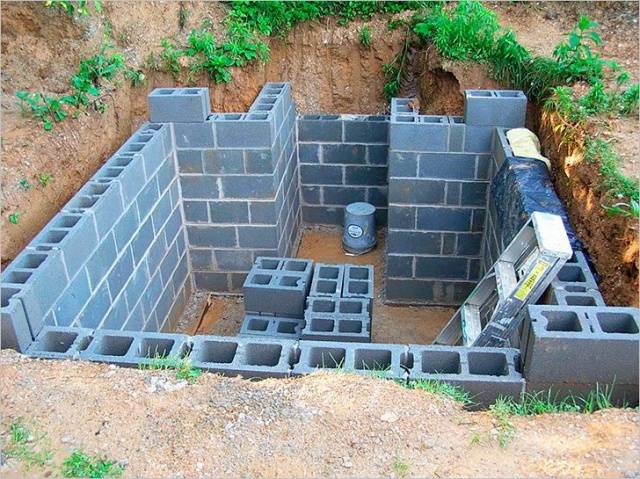
- In the area where dampness is constantly in the ground, the walls of the storehouse are erected from monolithic concrete. It is poorly permeable to moisture, and is characterized by high density.
- When the garage is being built at the same time as the cellar, then preference should be given to the strip foundation. It can become part of the walls of the vault.
- In a region with a low amount of precipitation, as well as in areas with a deep location of groundwater, it is allowed to build storage walls from asbestos-cement slate.
It seems to have covered all the important points, and now you can proceed step by step to consider how the basement under the garage is properly erected.
The video tells about the cellar in the garage:
Choosing the right material
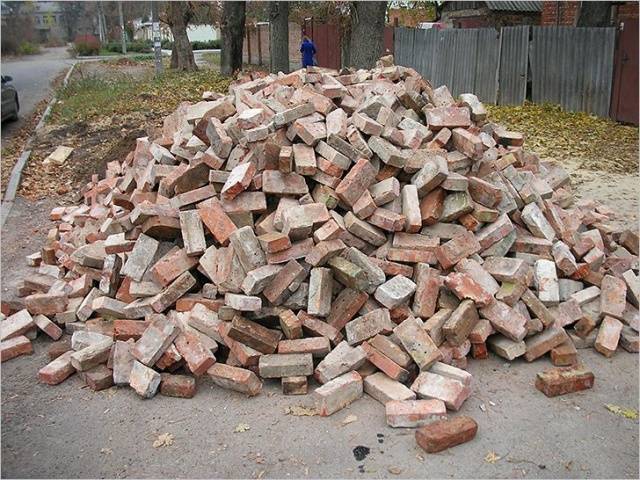
For the construction of walls in the cellar of the garage, brick, reinforced concrete slabs, blocks and a savage stone are suitable. You can fill in monolithic concrete walls. This option is very reliable but time consuming. The use of reinforced concrete slabs is justified at the initial stage of construction, when there is still no garage, because they can only be mounted with a crane. The easiest way is to build red brick walls. The work can be done alone without help. Even a used brick, which is shown in the photo, will do.
You will need concrete to fill the foundation. A ready-made solution can be ordered at the enterprise, but it will cost more. When self-preparing, you will need cement, clean sand, crushed stone or gravel. Formwork for pouring concrete is knocked down from old boards or plywood. Roofing material is optimal for waterproofing walls, foundations and floors. If you have extra funds, you can buy a membrane. For protection against freezing, expanded polystyrene is best suited as thermal insulation.In the worst case, you can get by with mineral wool.
Preparation of the pit, floor and foundation
The arrangement of the pit looks like this in stages:
- First, you need to dig the hole itself. Doing it manually or with the help of an excavator depends on the preference of the owner.
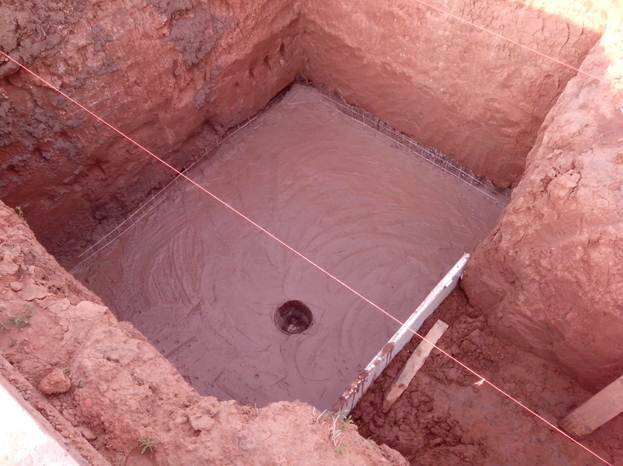
- The bottom of the pit is rammed, then covered with a layer of sand with gravel. Another compaction is performed, after which a thin layer of liquid concrete is poured. The total thickness of the base should be at least 80 mm.
- When the concrete hardens, the floor is covered with waterproofing from two layers of roofing material. The edges of the material should protrude beyond the border of the future foundation. The joints of roofing material are overlapped, gluing them with molten bitumen. In the future, a concrete screed can be poured on top of the waterproofing, which will become the cellar floor. For reliability, a reinforcing mesh must be embedded in the concrete.
- Further, on the finished base from the boards, formwork is installed, a reinforcing frame is placed inside, after which they proceed to pouring the strip foundation.
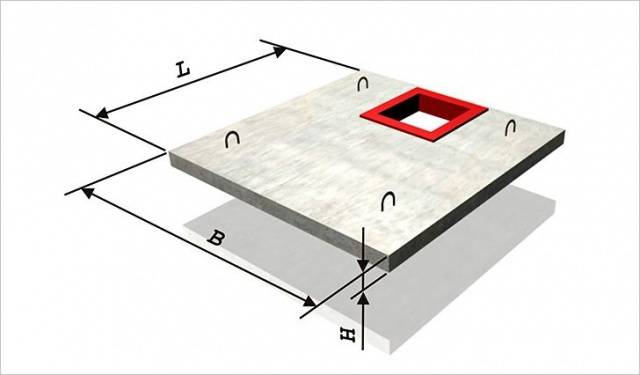
If a cellar with a garage is being built from scratch, the arrangement of the bottom can be simplified by laying reinforced concrete slabs. For this, the bottom of the pit is covered with sand with crushed stone 150 mm thick. The plates are lowered into the pit with a crane, while trying to lay them as evenly as possible in level.
Walling
After the strip foundation has completely solidified, and this will happen no earlier than a month later, the formwork is removed. The earthen walls of the pit are covered with roofing material. The edges of the waterproofing on the pit surface are pressed down with bricks.
Now you can start laying out the walls. It doesn't matter which blocks were chosen, the masonry starts from the corners. At the same time, the dressing of the seams between the rows is observed. To make the walls even, in the process, measurements are taken with a level and a plumb line.
If a decision is made to erect monolithic concrete walls, then formwork will have to be built. Usually it is built in tiers. When the concrete of one pour hardens a little, the formwork is understood above, and a new pour is performed. This process continues until ground level is reached.
Overlapping the cellar and its insulation
When the basement walls are ready, it's time to think about overlapping. By the way, at this stage, the cellar in the garage is insulated, because the walls of the storage are protected from the cold by the earth, and the owner will have to take care of the overlap.
It must be remembered that the basement ceiling is at the same time the garage floor. It must withstand the weight of the machine, plus a bunch of spare parts, racks, etc. It is optimal to use a reinforced concrete slab to overlap the storage. The hole for the hatch is cut out with a grinder. The entrance frame is welded from a metal corner or channel. Hinges are welded to it, and the hatch is hooked.
Now we are figuring out how to insulate a cellar in a garage using different materials. A budget option is to use glass wool. But first you need to waterproof the floor. As an option, bitumen mastic or self-melted bitumen over a fire is suitable. The entire reinforced concrete slab is covered with a thick mass, after which glass wool is laid. Further, in the garage, you can lay a wooden floor.
The ideal insulation for the cellar under the garage is expanded polystyrene. The slabs are fixed on the outside of the foundation, on the inside of the floor, that is, on the ceiling of the basement, and also on the walls from the inside.
Arrangement of ventilation in the basement
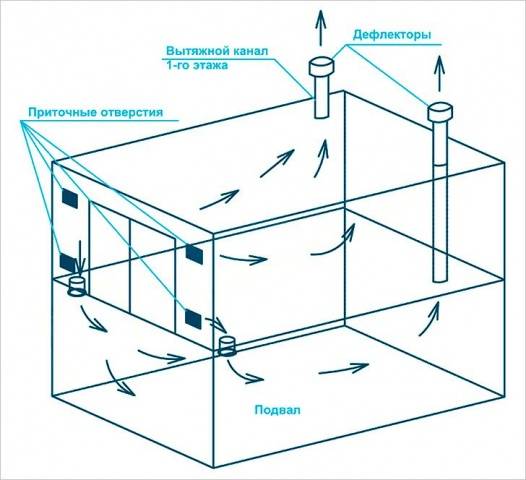
Ventilation in the cellar is necessary to maintain an optimal microclimate, conducive to long-term storage of products. It is easier and cheaper to make natural ventilation. For this, at least two pipes must be installed.Fresh air will enter the storage through one air duct, and an exhaust hood will turn out from the other pipe into the street.
A large cellar with a garage can be equipped with forced ventilation. Such a system will cost the owner dearly. It requires the installation of electric fans, the development of a project, and all this will have to be addressed to specialists.
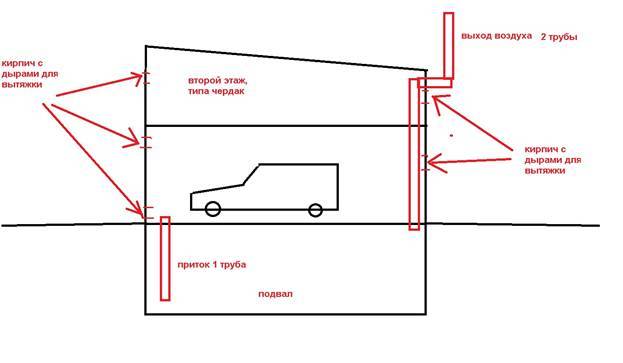
Natural ventilation is done independently. For an illustrative example, we provide two layouts of air ducts. The exhaust pipes are fixed under the very ceiling, but the openings of the supply air ducts are located 100 mm above the basement floor. On the street, supply and exhaust pipes are led out 500 mm above the roof level. All air ducts are equipped with caps that prevent the penetration of rain and snow into the room.
That's all the secrets of building a cellar under the garage. When both rooms are ready, they proceed to their internal arrangement.


