Content
When a small child grows up in a family, parents try to equip a children's corner for him. The best outdoor activity is the playground with swings, slides and sandpit. In cities, such places are equipped with appropriate services, but at their summer cottage, parents have to create a children's corner on their own. Now we will talk about how to make a children's sandbox with our own hands, and consider several interesting projects.
Where is it better to install a sandbox for a child
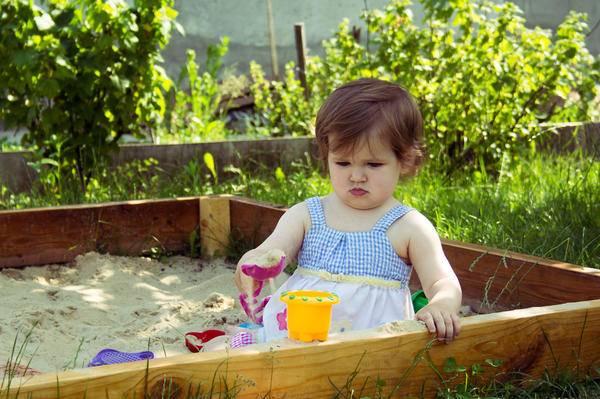
Even if a sandbox for a child is installed in the yard, it should not be hidden behind tall plantings or buildings. A play area with children should always be in full view of the parents. It is optimal to place the sandbox near a large tree so that on a hot summer day its crown protects the playing child from the sun. However, you should not shade the playing area too much. On cool days, the sand will not warm up, and the baby may catch a cold.
It is optimal when the built sandbox will be partially shaded. Such a place can be found in a garden among the trees, but it is usually located out of the sight of parents and is not found in every summer cottage. In this case, there are few ideas for placement. All that remains is to equip the play area in the sunny part of the courtyard, and to shade it, make a small canopy in the shape of a fungus.
What materials are better to build a sandbox
Shop sandboxes for children are made of plastic. This is the best material in this case. Plastic has no burrs and is resistant to aggressive environmental influences. But since it has already been decided to make a children's sandbox with your own hands, then it is better to choose wood as a building material. The material is easy to process. You can cut out the most beautiful figures of fairy tale heroes or animals from the board. The only requirement is good wood processing. All elements of the sandbox are made with rounded corners and well polished from burrs so that the child does not injure himself during the game.
An alternative option to wood is car tires. From tires, there are many ideas for sandboxes, and successful ones. Craftsmen cut out birds and animals from tires, and the sandbox itself is made in the form of a flower or a geometric figure.
Among the many ideas, it is worth considering the use of a stone. A sandbox made of cobblestone or decorative bricks turns out to be beautiful. If desired, you can lay out a whole playground with a castle, sandbox, labyrinths, etc. However, in terms of safety, the stone is not the best material due to the possibility of injury to the child. Parents make such structures at their own peril and risk.
Making a wooden sandbox with a lid
Now we will consider a common option, how to make a sandbox with our own hands from wood with a lid. From the very beginning, we will discuss all questions regarding the design scheme, the choice of optimal sizes, materials and other nuances.
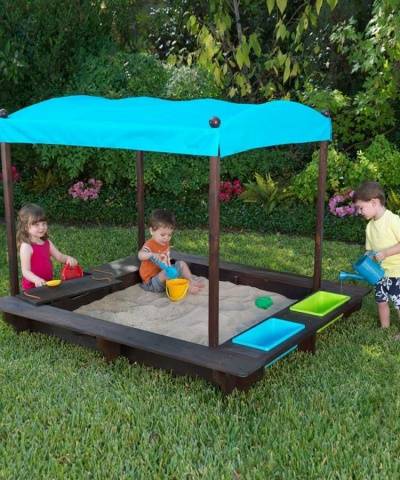
The wooden sandbox is a rectangular box, and to make it you do not need to develop a complex project or draw drawings. The optimal dimensions of the structure are 1.5x1.5 m. That is, a square box is obtained. The sandbox is not very spacious, but there is enough room for three kids to play.If necessary, the compact dimensions of the structure allow you to transfer it to another place in the summer cottage.
From the very beginning, you should think about the design of the sandbox. So that the child can rest during the game, it is necessary to build small benches. Since we make the sandbox lockable, in order to save material, the lid should consist of two parts, and transform into comfortable benches.
The height of the sides of the box should allow to accommodate such an amount of sand that the child does not grab the ground with a shovel. But a very high fence cannot be built either. It will be difficult for the kid to climb through it. Determining the optimal dimensions of the board, you can take blanks 12 cm wide. They are knocked down in two rows, getting sides 24 cm high. For a child under five years old, this will be enough. Sand is poured into the box with a thickness of 15 cm, so there is optimal space for comfortable sitting between it and the bench. It is better to take a board with a thickness within 3 cm. Thinner wood will crack, and a heavy structure will turn out from thick blanks.
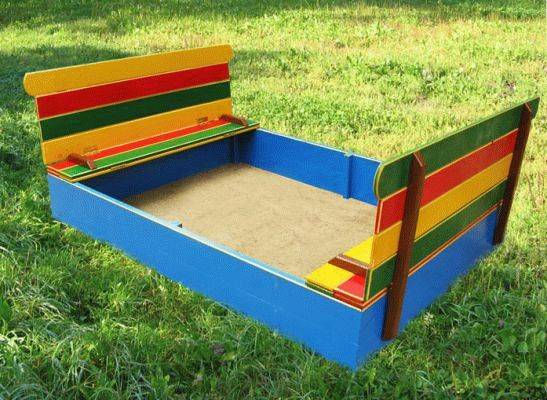
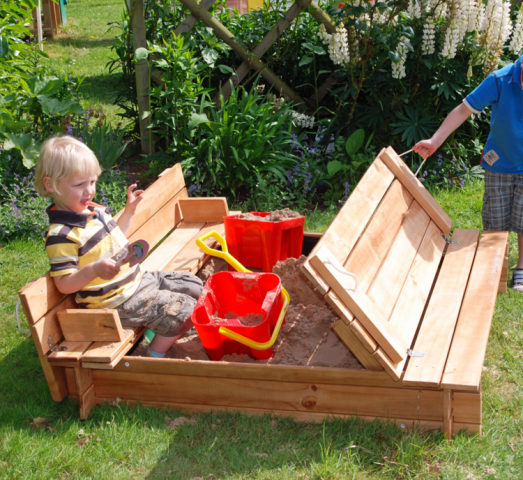
In the photo, a do-it-yourself children's sandbox is shown in finished form. The lid of two halves is laid out on comfortable benches with a back. We will consider how to create such a construction step by step.
Before we move on to making the box, we need to consider the design of the lid and its purpose. Someone will say that the sandbox can be made without benches, so as not to fiddle with the lid, but it's not just about them. You still have to cover the sand. The cover will prevent the ingress of leaves, branches and other debris, protect against encroachment by cats. Covered sand will always stay dry after morning dew or rain.
Transforming the lid into benches is a good idea to equip additional amenities on the playground. In addition, you do not have to constantly take it to the side and think about where to remove it from under your feet. The structure should open easily and not move out of its place. To do this, the lid is made of a thin board 2 cm thick, and attached to the box with hinges.
So, we figured out all the nuances. Further, a step-by-step instruction for making a sandbox with a lid is offered:
- At the installation site of the sandbox, the sod layer of the earth is removed along with the grass. The resulting depression is covered with sand, tamped and covered with geotextiles. You can use black agrofibre or film, but the latter will have to be perforated in places for drainage. Covering material will prevent weeds from growing in the sandbox, and will prevent the child from reaching the ground.
- At the corners of the future fencing, racks are driven into the ground from a bar with a thickness of 5 cm.Since we decided that the height of the sides will be 24 cm, then we take blanks for racks 45 cm long.Then 21 cm will be hammered into the ground, and a part of the rack will remain on one level with the sides.
- The boards are cut to a length of 1.5 m, after which they are carefully sanded so that not a single burr remains. Business is not easy, so if possible, it is better to use a grinder. The finished boards in two rows are screwed to the installed racks with self-tapping screws.
- Now let's figure out how to build a cover with benches. In our sandbox, its arrangement is simple, you just need to prepare 12 boards with a length of 1.6 m. Why is this length taken? Yes, because the width of the box is 1.5 m, and the lid should extend slightly beyond its borders. The width of the boards is calculated so that all 12 pieces fit on the box. If the boards are wide, you can take 6 of them. The main thing is that in each half of the hinged cover there are three separate segments.
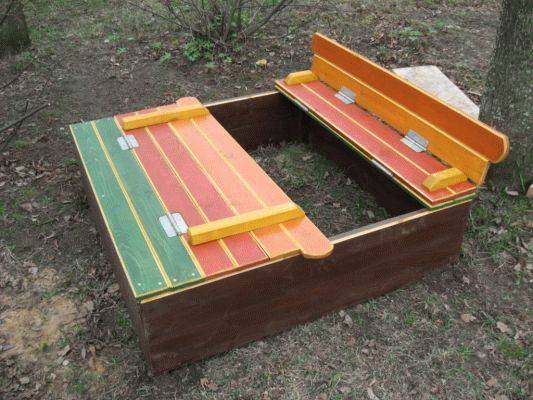
- So, the first segment of the hinged half is screwed to the edge of the box with self-tapping screws. This element is stationary and will not open. The second segment is connected to the first with loops from above. The third segment is connected to the second with loops from below. From above to the third segment I screw two bars perpendicularly.Their length covers the width of the second segment, but the blanks are not attached to it. The bars in the unfolded bench will play the role of a backrest limiter from the back. From the bottom of the second segment along its width, it is necessary to fix two more bars, which will be the limiters of the back in front, so that it does not fall.
- The exact same procedure is performed with the second half of the lid. In the photo, you can clearly see the design of the lid with the half folded and unfolded.
When the sandbox is completely finished, you can fill up the sand. We have already spoken about the thickness of the layer - 15 cm. Purchased sand is sold clean, but river or quarry sand will have to be sifted and dried independently. If the sandbox is installed permanently and there are no plans to move it, the approach to the play area can be laid out with paving slabs. The soil around the sandbox is sown with lawn grass. You can plant undersized small flowers.
Ideas for improving children's sandboxes
Further, we offer you photos and ideas of children's sandboxes with your own hands, according to which you can equip a playground at home. We have already examined the made benches from the lid, and we will not repeat ourselves. By the way, this option can be taken as a standard for arranging any rectangular sandbox.
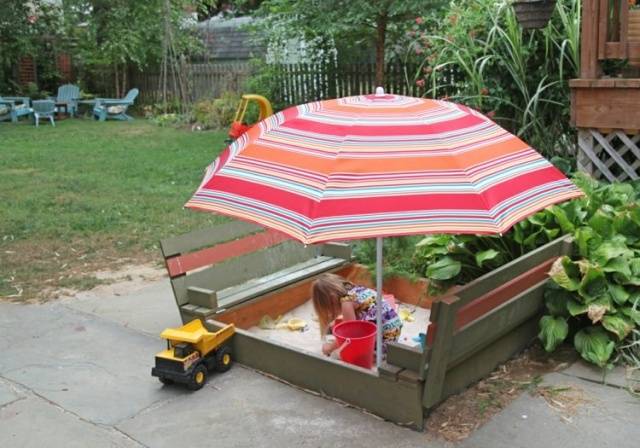
You can make an excellent fungus over the play area using a large umbrella. They are often used when relaxing on the beach. The umbrella is installed so that it shades the sandbox, but does not interfere with the child's play. The only drawback of such a canopy is instability during the wind. For the reliability of the structure, a collapsible clamp is provided on one of the sides, with which the umbrella bar is fixed during the child's play.
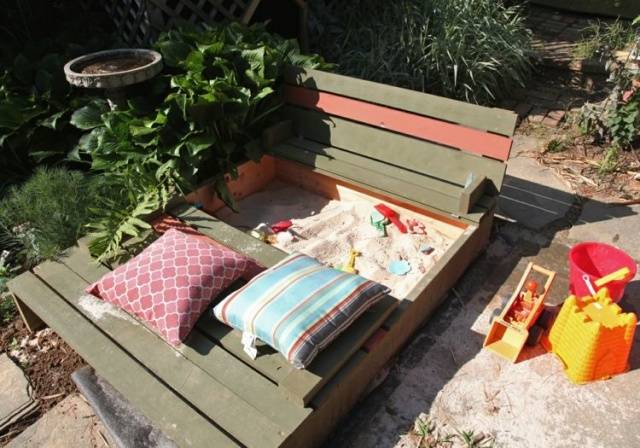
Returning again to the hinged lid, it should be noted that the bench can only be made from one half. The second part of the shield is also made folding, but solid without segments. The lid is attached with hinges directly to the box. The box itself is divided by a jumper into two compartments. A niche is organized under a one-piece lid for storing toys or other things. The second compartment with a bench is filled with sand for the game.
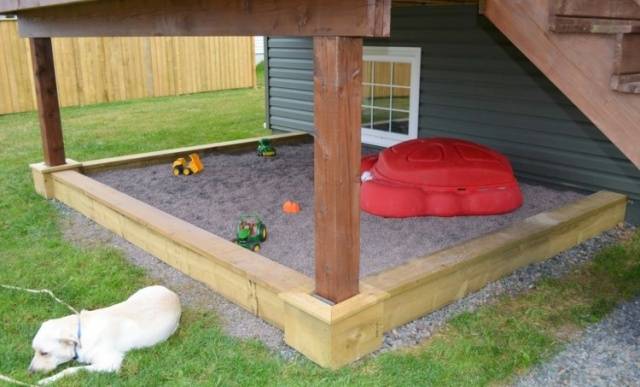
If there is space under the steps of the house, it will be possible to organize a good playground here. It can be difficult to install the lid, so the bottom of the sandbox is arranged in a different way. In strong winds with rain, drops of water will fly onto the sand. So that there is no dampness on the site under the house, the bottom of the sandbox is covered with rubble, then geotextiles are laid, and sand is poured on top. The drainage layer will remove excess moisture, and after the rain, the playground will dry out quickly.
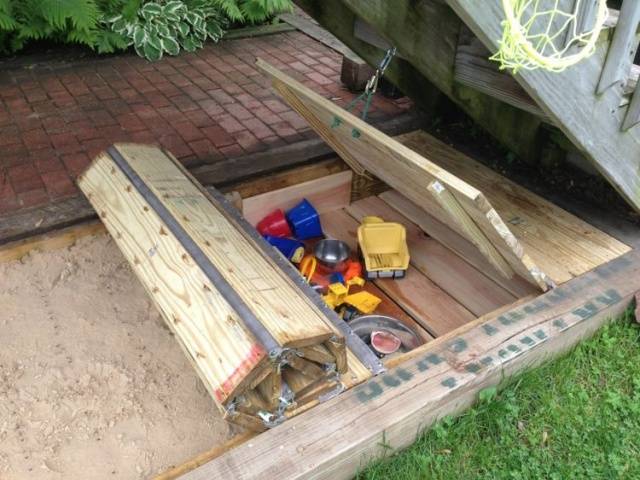
Sandbox covers do not have to be transformable into benches. The box can be divided into two compartments: in one - to make a niche for toys with a hinged lid, and in the other - to organize a sandbox with a roll-up lid.
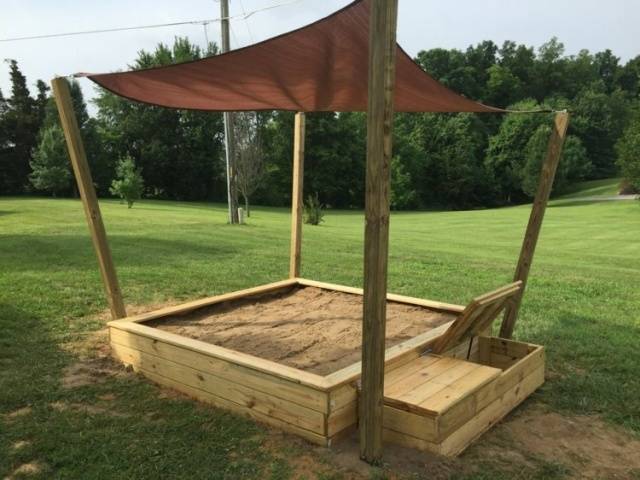
If tall posts are installed in the corners of a square sandbox, a canopy can be pulled from the top of the tarpaulin. Boards are nailed flat on the edges of the boards. They will make benches without a back. Behind a fence made of boards, a chest is knocked down into one or two compartments. The box is perfect for storing toys. On the lid of the chest, limiters can be provided, which will become her emphasis in the open state. Then a comfortable back will appear on one of the benches.
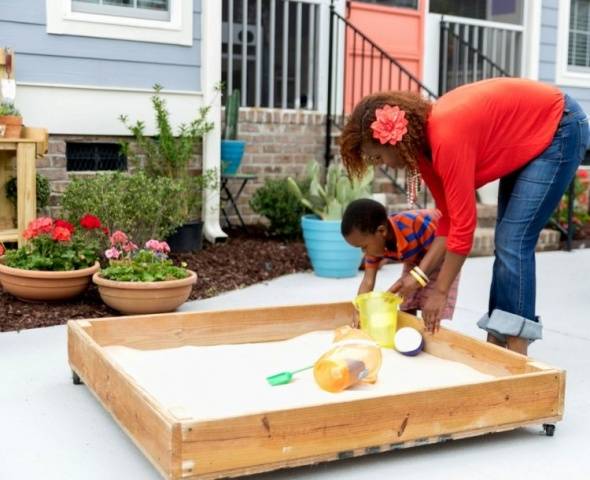
Have you dreamed of a mobile sandbox? It can be made on castors. Mom can roll such a playground on a hard surface to any place in the yard. Furniture wheels are attached to the corners of the box. Sand and children have an impressive weight, so the bottom of the box is made of a board 25–30 mm thick, and small gaps are left between them. They are needed to drain moisture after rain. To prevent sand from spilling into these cracks, the bottom is covered with geotextiles.
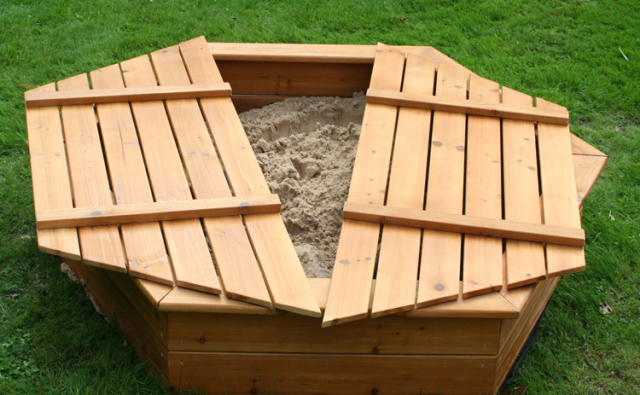
The sandbox does not have to be square or rectangular.By installing additional posts along the perimeter of the structure, you get a hexagonal fence. With a little thought, the box can be made triangular or in the form of another geometric shape.
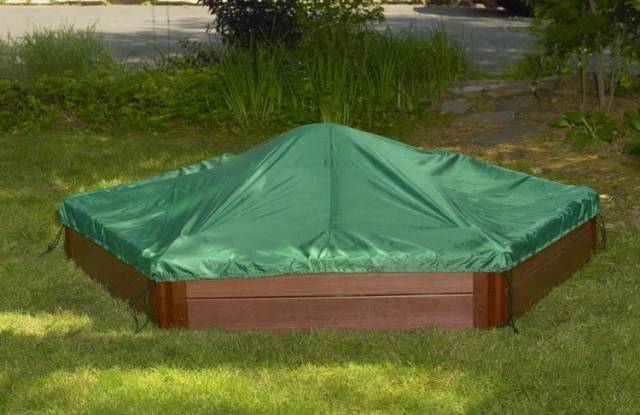
Replacing the wooden lid on the sandbox will help a cape made of non-soaking tarpaulin. It is especially relevant for structures of complex shapes, where it is difficult to make a wooden shield.
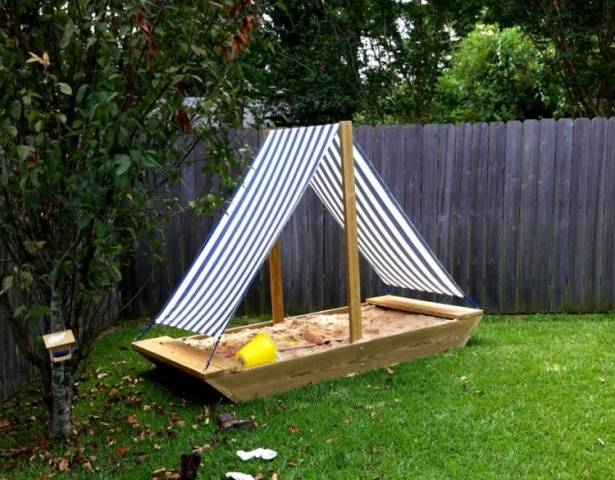
The sandbox can be not only a place for playing with toy cars or making cakes. The simulated ship-like structure will send young travelers on a voyage around the world. A sail is fixed to the opposite sides of the box of colored material. From above it is held by a crossbar between two posts. In addition, the sail will provide shade to the playing area.
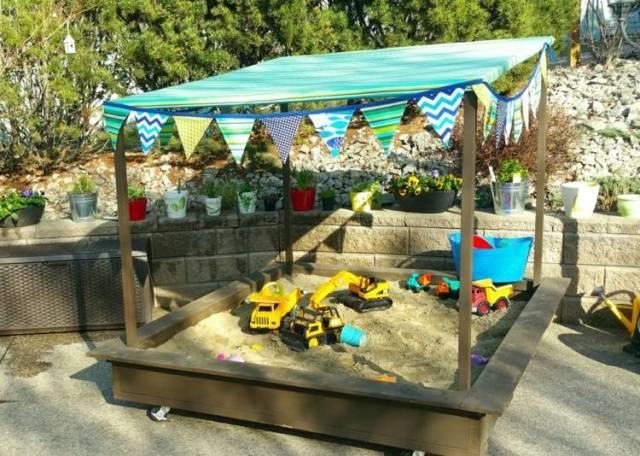
We have already talked about a mobile sandbox on wheels. Its disadvantage is the lack of a canopy. Why not build it? You just need to fix the racks from the timber at the corners of the box, and stretch the colored fabric or tarpaulin from above. Colored flags can be attached to the sides between the posts. On such a ship, you can ride the children around the yard a little.
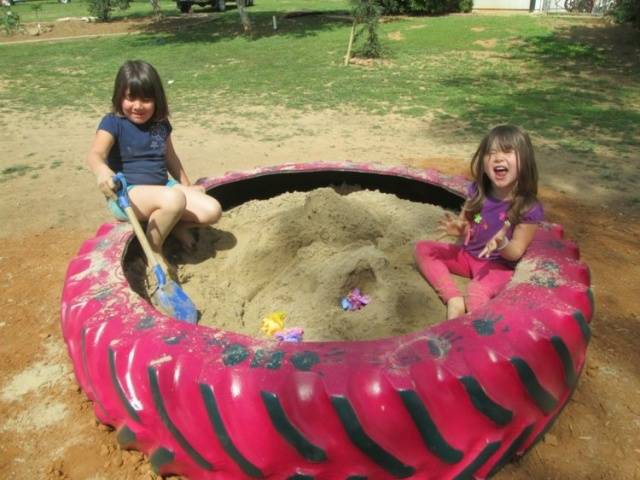
An alternative to the traditional wooden box is a large tractor tire sandbox. A side shelf is cut into the tire, leaving a small edge near the tread. The edges of the rubber are not sharp, but it is better to close them with a hose cut along the length. The tire itself is painted with multi-colored paints.
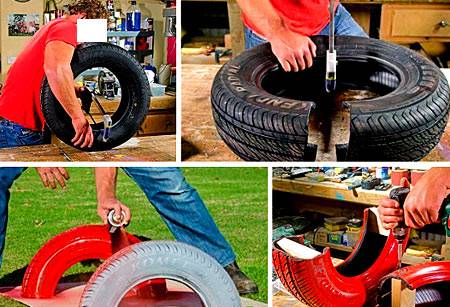
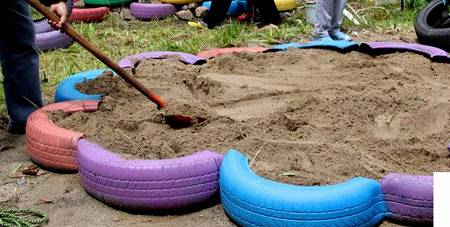
Small tires give free rein to imagination. They are cut into two or three equal segments, painted in different colors, and then sandboxes of unusual shapes are created. Connect each segment of the bus using wire or hardware. There are many options for making sandboxes. The most common form is a flower. It is laid out from five or more tire halves. The sandbox frame of a complex shape, made of flexible material, is sheathed with pieces of tires.
The video shows a version of the children's sandbox:
Conclusion
So, we looked in detail at how to make a children's sandbox and options for ideas for improving it. The construction you have assembled with love will bring joy to your child and peace of mind to your parents.


