Content
Swimming pool construction is expensive. The price of ready-made bowls is exorbitant, and you will have to pay a lot for delivery and installation. If the arms are growing out of the right place, the PP pool can be assembled by yourself. You just need to buy sheets of elastic material, find equipment for soldering and assemble a bowl of the desired size yourself.
Reality or just a dream
Most owners of private houses immediately discard the idea of self-assembly of the pool. If the family budget does not allow, then one can only dream of a hot tub. However, do not limit yourself to comfort. Installing a polypropylene pool with your own hands is no more difficult than building a utility block.
The purchase of polypropylene sheets for the bowl will be much cheaper than the purchase and installation of a ready-made hot tub. However, there will be a problem with finding soldering equipment. It is unprofitable to buy because of the high cost, and you will need a soldering iron only once. Ideal to find equipment for rent. Another problem is the lack of PP welding skills. You can learn how to solder on a piece of sheet. Some material will have to be spoiled, but the costs will be small.
Properties of polypropylene
Polypropylene is easy to use and is in demand by builders in the construction of hydraulic structures. The advantage of the material for the manufacture of a polypropylene pool is as follows:
- The dense structure of polypropylene does not allow moisture, gas, and retains heat. The sealed material will not allow groundwater to penetrate into the bowl. Due to the low thermal conductivity, the cost of heating the pool is reduced.
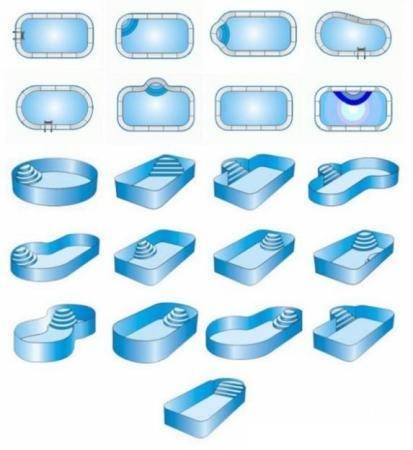
- Polypropylene is flexible. The sheets bend well, which allows you to create complex bowl shapes. The attractive yet non-slip surface is a big plus. A person stays steadily in a polypropylene pool, without fear of slipping on the steps.
- The sheets do not fade during the entire period of use. The bowl remains attractive even after exposure to chemicals.
Subject to the installation technology, the polypropylene pool will last at least 20 years. The construction work will take about a month, but will be cheaper compared to buying a solid bowl.
The location of the hot tub
There are only two main places for a polypropylene pool on the site: in the yard or inside the house. In the second case, you will need a specialized room, protected from dampness. Due to the large amount of water in the pool, a high level of humidity is constantly maintained, which negatively affects the structural elements of the house.
If the polypropylene pool bowl will be installed without recess, high ceilings and additional space will be required. Around the font, you will have to equip a frame for the sides, install stairs and other structures.
It is wiser to deepen the polypropylene bowl so that the pool is at floor level. The problem with high ceilings disappears, but the question arises regarding the integrity of the building. Will digging under the bowl harm the foundation and the whole house?
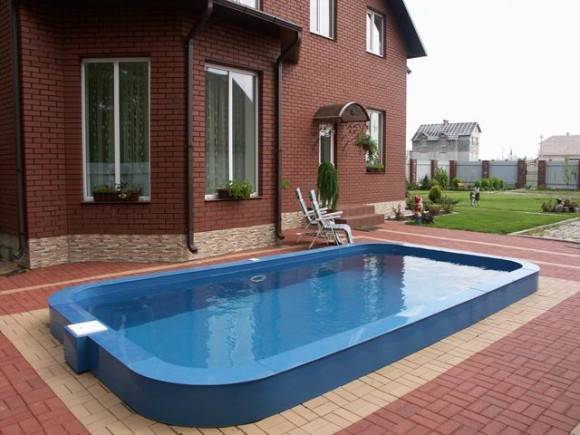
The best place for a pool is an open area. The polypropylene bowl is not afraid of frost and heat. If you want to protect the resting place or use it all year round, a frame lined with polycarbonate or other lightweight material is erected over the font.
Choosing a place for the bowl in the yard
When choosing a place for a polypropylene pool in an open area, a number of factors are taken into account:
- Arrangement of tall trees. A polypropylene bowl should not be dug in close, even to young plantings. The root system of trees grows, reaches for moisture and, over time, will break the waterproofing of the font. The second problem will be clogging of the water in the pool with foliage, falling branches and fruits.
- Soil composition. It is better to dig a polypropylene bowl into clay soil. In the event of a violation of the waterproofing, the clay will prevent the rapid leakage of water from the pool.
- The relief of the site. A polypropylene pool is not placed in lowlands, where there is a threat of flooding by rainwater flowing down from the hill along with mud. If the site is with a slope, then it is better to choose its high part.
Frequent wind direction is an important factor. In the side where the air flows are directed, an overflow pipe is placed on the polypropylene bowl. The wind will blow debris into one place, and it will be removed from the pool through a pipe along with excess water.
A step-by-step guide to building a polypropylene hot tub
To install a polypropylene pool, they begin with the preparation of the pit. At this time, it is necessary to firmly decide on the size and shape of the bowl. The instruction for the construction of a polypropylene hot tub consists of the following steps:
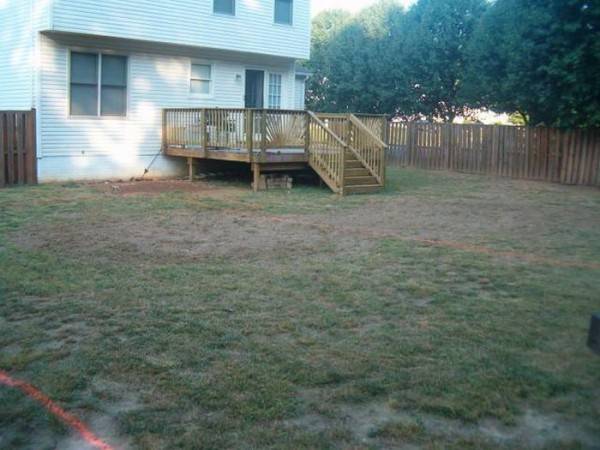
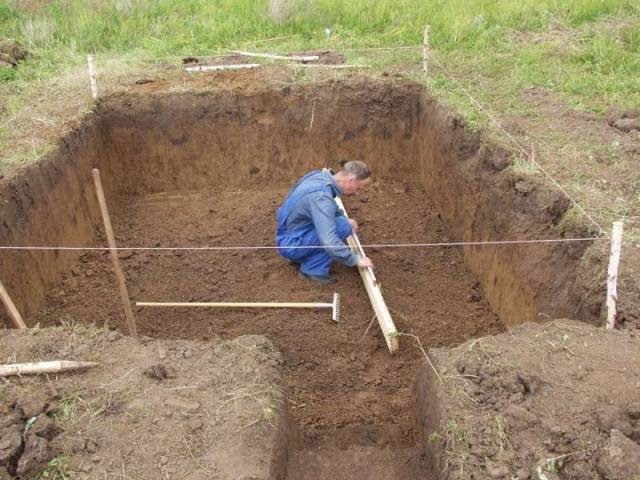
- Arrangement of the pit begins with marking the site for the font. The contour is marked with stakes with a stretched cord. The pit is given the shape of a future polypropylene bowl, but the width and length are made 1 m larger. The depth is increased by 50 cm. The stock is needed for pouring concrete and connecting the equipment of a polypropylene pool. It is better to excavate the land with an excavator. If the site does not allow the vehicles to enter freely, they will have to dig manually.

- When the pit is ready, lighthouses are made from wooden stakes. They are driven into the ground, indicating the upper location of the contours of the polypropylene bowl. The bottom of the pit is leveled and tamped. If the soil is sandy, it is advisable to pour a layer of clay and tamp it again. The bottom of the pit is covered with geotextiles. A layer of rubble 30 cm thick is poured on top.
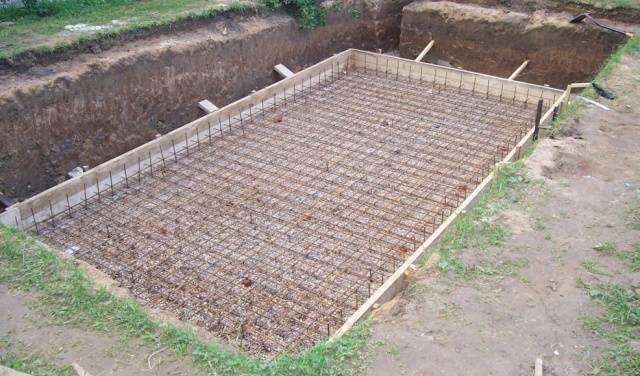
- The bottom of the pit covered with rubble is leveled. You can check the swings with a long rule or a taut cord. For arranging a reliable bottom, a reinforcing frame is made. The grate should not lie tightly on the rubble. Pieces of brick will help provide the gap. The halves are laid out along the entire bottom of the pit at a distance of 20 cm from each other. The reinforcing frame is made of reinforcement. The rods with a thickness of 10 mm are laid out in bricks in the form of a grid to form square cells. The reinforcement is not welded to each other, but connected with a knitting wire. A hook is used to tie the reinforcement with wire. The device speeds up and simplifies the process.
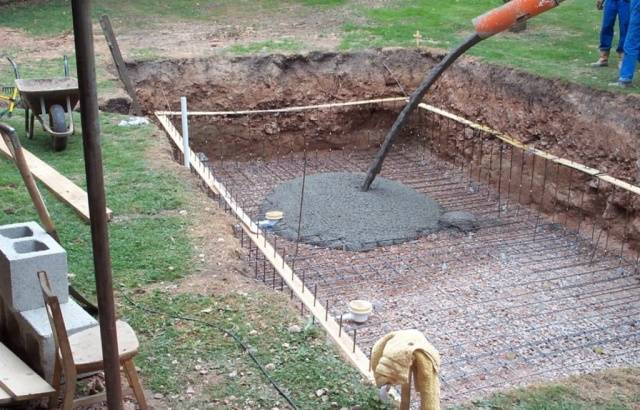
- You can get a solid monolithic base of a polypropylene pool only when pouring the solution at a time. Large volumes are prepared in concrete mixers. The solution is fed through homemade gutters made of tin or boards. It will be easier and not much more expensive to buy a ready-made solution mixed in a construction mixer.
- The solution is evenly poured over the entire area of the bottom of the pit, where the reinforcing frame is laid. Layer thickness - at least 20 cm. Work is carried out in dry cloudy weather with an air temperature above +5aboutC. In the cold season, concreting is not done, since there is a threat of cracking of the reinforced concrete slab. If pouring is carried out in hot weather, cover the concrete base with foil. Polyethylene will prevent rapid evaporation of moisture from the solution. The length and width of the concrete base are made 50 cm larger than the dimensions of the polypropylene bowl.
- The hardening time of concrete depends on weather conditions, but further work begins no earlier than two weeks later. The hardened and dried reinforced concrete slab for the font is covered with sheets of thermal insulation. Polystyrene foam is usually used.
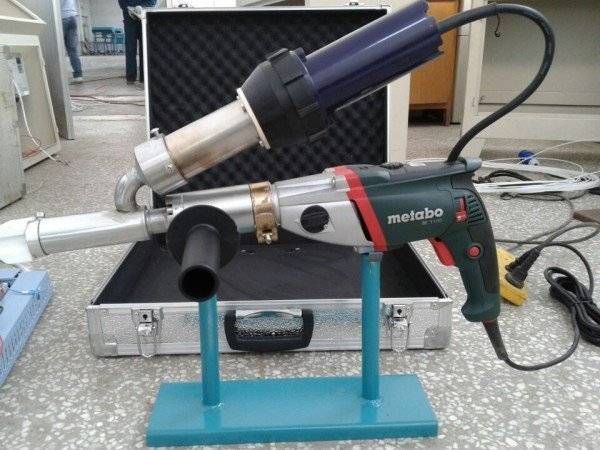
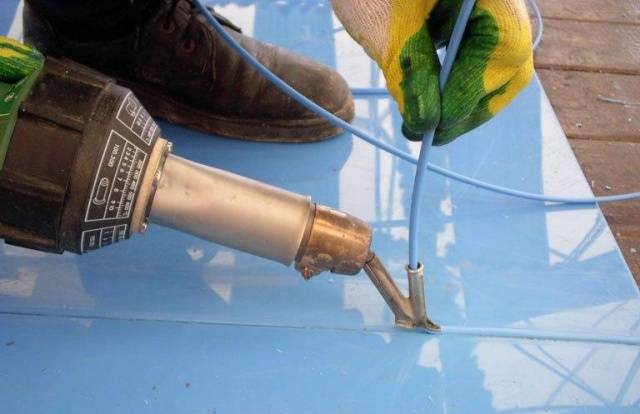
- The next stage is the most crucial. It's time to start making a polypropylene bowl. Soldering of sheets is carried out with a heat gun - extruder. The quality and tightness of a polypropylene pool depends on neat seams. If you haven't done welding before, they train on pieces of polypropylene. Spoiling one sheet of polypropylene to gain skill is cheaper than patching up a defective bowl.
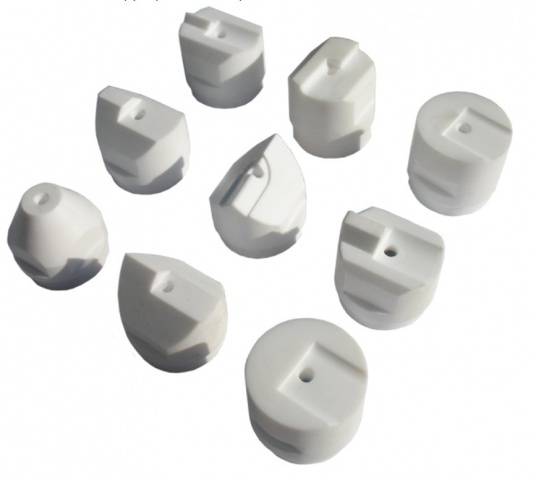
- Included with the extruder are nozzles of different shapes. They are designed for soldering seams of varying complexity.
- Soldering of polypropylene with an extruder occurs due to the supply of high temperature air. At the same time, a polypropylene soldering rod is introduced into the gun. The hot air heats up the edges of the butted polypropylene pieces. At the same time, the rod melts. Hot polypropylene solders the fragments of the sheets, forming a tight, smooth seam.
- The soldering of the polypropylene bowl begins with the manufacture of the bottom. Sheets are cut out in fragments of the desired shape, laid out on a flat area and soldered on the outer joints of the bottom of the font. On the reverse side, the joints are also soldered so that the polypropylene sheets do not break. To get a strong and thin seam, the edges of the polypropylene fragments to be welded are cleaned at an angle of 45about.
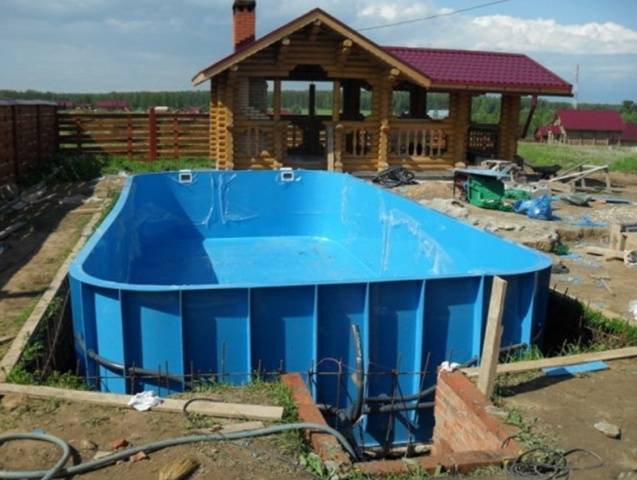
- The finished soldered bottom of the polypropylene hot tub is placed on a concrete slab, where expanded polystyrene has already been expanded. Further work consists in installing the sides of the font. Polypropylene sheets are soldered to the bottom of the bowl, welding the joints on the inside and outside.
- The sides of the polypropylene font are soft. During the welding of the sheets, temporary supports are installed to help maintain the shape of the bowl. Simultaneously with the sides, polypropylene steps and other provided elements of the pool are welded.
- When the polypropylene font is ready, stiffeners are arranged along the perimeter of the sides. The elements are made from polypropylene strips. The ribs are welded vertically to the sides of the font, keeping a distance of 50–70 cm.
- After soldering a bowl made of polypropylene sheets, the next important point comes - the connection of communications and equipment. Holes are drilled in the font, where drain and filling pipes are connected through nozzles. Communications are supplied to the pumping equipment of the pool, a filter is connected. An electric cable is laid to the polypropylene font. If a backlight is provided, then it is also equipped at this stage.
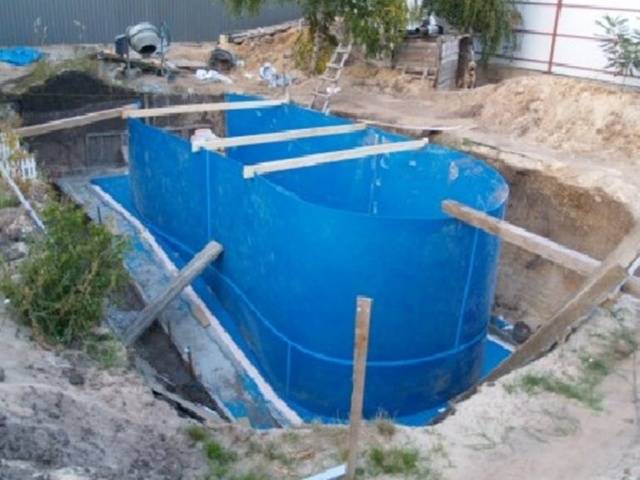
- A little water is drawn into the polypropylene pool to test the equipment. If the result is positive, the bowl is prepared for strengthening. The procedure provides for the layer-by-layer pouring of concrete into the gap between the sides of the font and the walls of the pit. The thickness of the concrete structure is at least 40 cm. If the gap remains about 1 m, then a formwork is installed along the perimeter of the sides of the polypropylene bowl.
- For strength, the concrete structure is reinforced. The frame is made of rods, according to the principle of reinforcing the bottom of the pit. Only the grill is installed vertically along the perimeter of the sides of the font. The solution is poured simultaneously with the filling of the bowl with water. This will equalize the pressure and avoid sagging of the polypropylene walls. Each subsequent layer is poured in two days. The procedure is repeated up to the very top of the sides of the font.
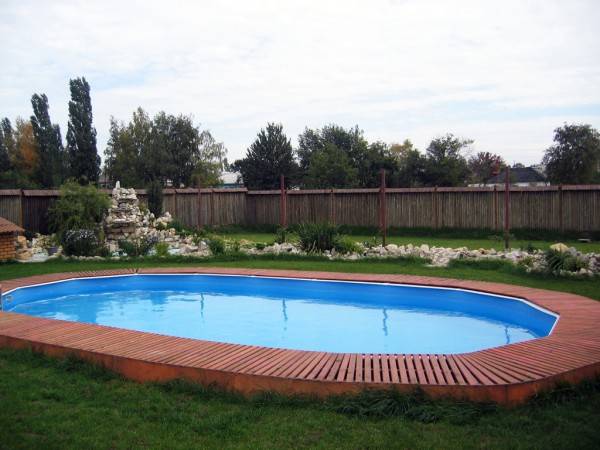
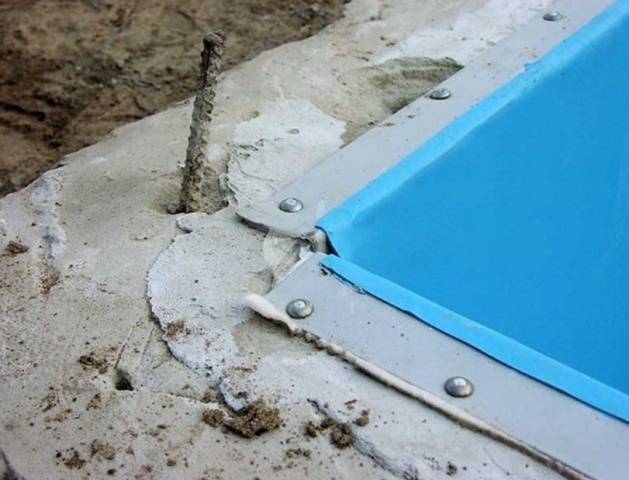
- When the concrete structure hardens, the formwork is removed. The gap between the walls is covered with earth with careful compaction. Butyl rubber or PVC film gives aesthetics to a polypropylene hot tub. The material adheres perfectly and is resistant to temperature extremes. The film is spread overlapping on the bottom and sides of the font. Bonding to polypropylene is carried out by cold welding.


The end of the work is the cultivation of the area around the pool from polypropylene. They cover the ground with paving slabs, install wooden platforms, and erect sheds.
The video shows the process of building a polypropylene pool:
The finished polypropylene bowl represents a huge structure. To avoid problems with the movement of the hot tub, soldering of polypropylene sheets is carried out directly at the installation site of the pool.


