Content
- 1 Layout and calculation of the dimensions of the chicken coop
- 2 Choosing the type of foundation for the poultry house
- 3 What to make a floor for a poultry house
- 4 Building the walls of the poultry house
- 5 Construction of the roof and ceiling of the poultry house
- 6 Poultry ventilation
- 7 Making nests and perches for chickens
The owners of private yards try to use their land to the maximum, therefore, in addition to growing vegetables, they are engaged in poultry and livestock raising. The easiest way is to have chickens at home. There will always be fresh homemade eggs and meat. However, keeping birds in the yard or fence will not work, since in winter they will simply freeze. So they need to build suitable housing. Now we will talk about how to build a chicken coop do it yourself, plan it correctly and equip it inside.
Layout and calculation of the dimensions of the chicken coop
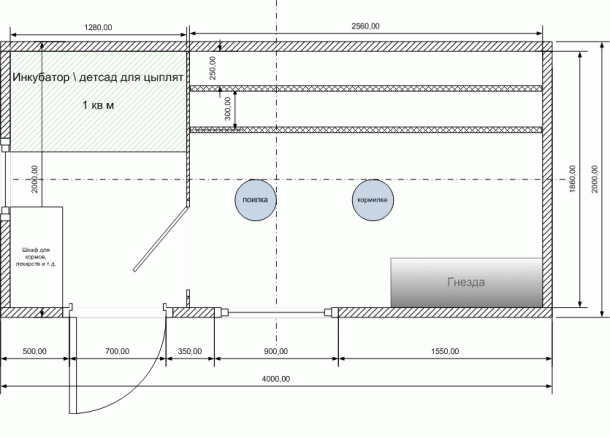
The planning of the poultry house begins after the number of chickens is precisely determined. The diagram shows a variant of a chicken coop with a compartment for chickens, but the room can be planned at your own discretion. It is important to immediately determine the size of the house. So that the chicken can move freely for two heads, 1 m is taken away2 free area. However, this does not mean that if the owner decided to have four laying hens, then a poultry house with an area of 2 m is enough for them.2.
Even if the owner decided to have 2–4 layers, the minimum area of the chicken coop should be 3 m2... This we discussed only the dimensions of the house, but the chickens still need to walk. In freedom, they develop, strengthen muscles, which affects egg production. It is impossible to release chickens into the yard, as they will peck cabbage and other vegetables in the garden. The only way out is to build a fence near the chicken coop. The walk is made from a net, where 1–2 m is allocated for each head2 free area.
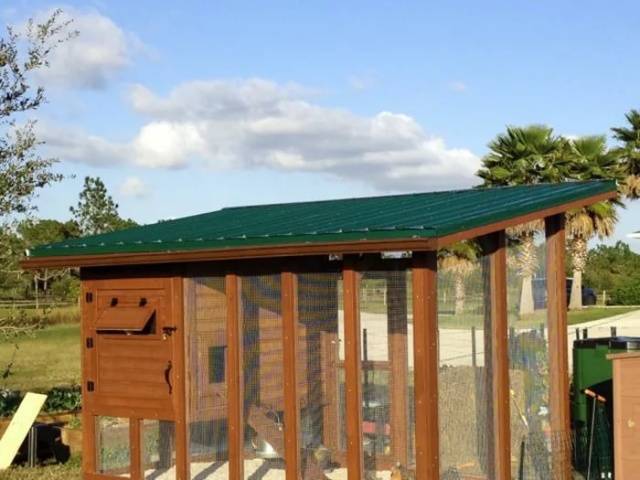
During construction do-it-yourself chicken coop the entrance doors of the barn and aviary should be located on the south side. It is desirable that the house be sheltered from the winds by other buildings or tree stands. The mesh is partially covered with lightweight roofing material. Under the roof, chickens will hide in the shade or from the rain.
A place for building a poultry house is chosen on a hill so that rain or melt water does not become an obstacle for chickens. Drainage is provided around the coop. This can be a regular moat that diverts water into a ravine.
Now we will look at how to properly prepare a place for a poultry house. If the site is located on a plain, you will have to make a small artificial embankment. To do this, use any construction waste, stones or just rubble. The following layers are poured regardless of where the site is located - in a lowland or on a hill:
- It will take a lot of crushed glass and clay. This mixture is spread about 10 cm thick over the entire area of the chicken coop. Thanks to the glass, small rodents will not penetrate into the house. Where there will be a walk, it is unnecessary to mix glass into clay, since chickens can reach it.
- The top layer is poured from sand with a thickness of about 15 cm.
When the site is ready, you can start building the foundation.
The video shows a winter poultry house with a walk:
Choosing the type of foundation for the poultry house
The construction of the chicken coop begins with the construction of the foundation. Let's take a look at how to choose the right base:
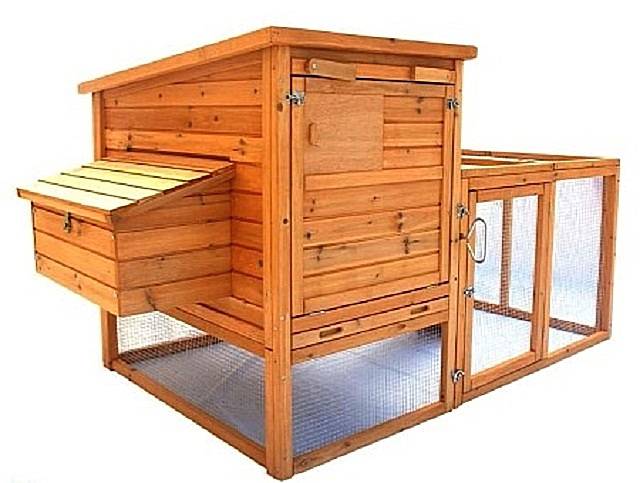
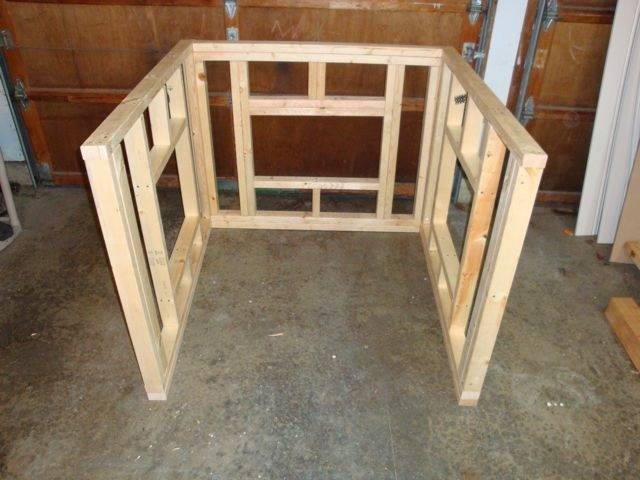
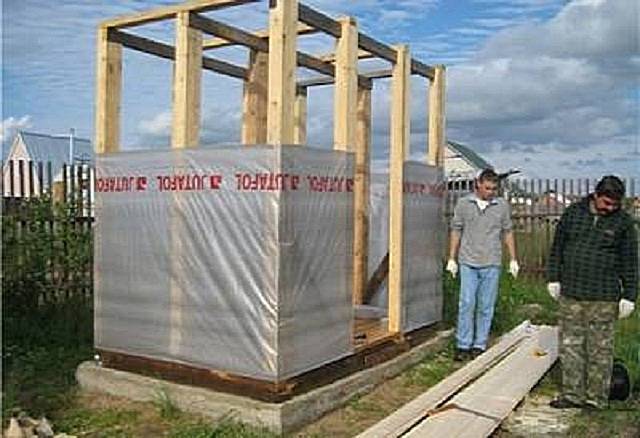
- For a small poultry house measuring 2x2 m, erected from a bar using frame technology, the concrete foundation does not need to be poured. A lightweight construction will withstand an embankment from clay, glass, crushed stone and sand. In this case, it is made at least 30 cm high. An example of a frame house is shown in the photo. The chicken coop is installed with the lower frame on an artificial embankment. The gap under the house is sewn up with a net that will protect against the penetration of predators. The frame itself and the place under the chicken coop are covered with a small layer of expanded clay.

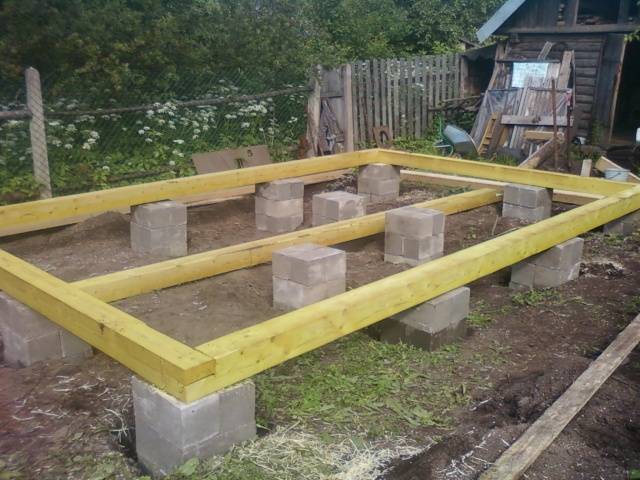
- A columnar foundation must already be erected under a large wooden chicken coop measuring 4x4 m. To do this, around the perimeter of the future poultry house, square holes with a depth of 70 cm are dug through 1 m. 10 cm of sand with crushed stone is poured onto the bottom, after which brick stands are laid. All posts must protrude at least 20 cm from the ground, and be at the same level. Brickwork is performed on concrete mortar. On top of each pedestal, a sheet of roofing material is laid for waterproofing, after which the main frame of the poultry house frame is knocked out of the bar.
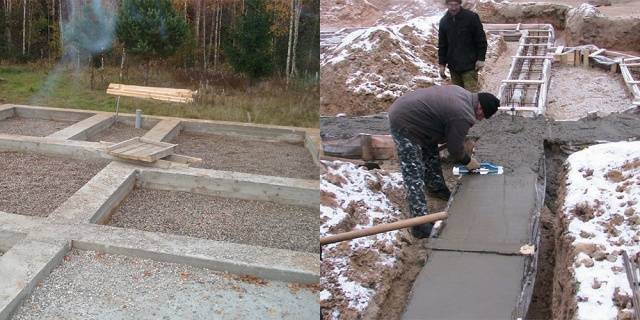
- Stone chicken coops are very heavy. They are rarely built, but there is still such a variant of the poultry house. Such a building is ideal for year-round keeping chickens in cold regions. A strip foundation is poured under the stone chicken coop. To do this, a trench is dug with a depth of at least 70 cm, formwork is placed, a reinforcing frame is laid, after which concrete mortar with crushed stone is poured.
There is another type of reliable foundation for which screw piles are used. They can be easily screwed into the ground on their own, but the high cost of piles is a luxury for a chicken coop.
What to make a floor for a poultry house
Continuing to study chicken coop device it is necessary to touch the correct arrangement of the floor. The bird stays here all day, and only sleeps on the roost at night.
Let's take a closer look at what and how you can make warm and durable floor poultry house:
- With frame technology for the construction of a chicken coop, the floor is laid from boards. If the house is to be used year-round, the flooring is made double, and insulation is placed between the sheathing.
- In a chicken coop built on a strip foundation, the floor can be left earthen, but the chickens will rake it. Clay mixed with straw is an excellent option. The mixture is spread in a thick layer over the entire area of the poultry house. After solidification of the mass, a monolithic warm floor is obtained. The most durable is the concrete screed. However, such a floor will be cold in winter. You will need to pour thick flooring or knock down the final floor from the boards on top of the concrete.
In a house built on a strip foundation, the floor of any material must be insulated from the ground. Roofing material sheets are used as waterproofing. They are laid with an overlap, wrapping the ends 20 cm on the walls. The joints of the sheets are glued together with hot bitumen. With year-round use of the chicken coop, the floor is additionally insulated with mineral wool or foam. The thermal insulation is placed on top of the waterproofing, then it is covered with another layer of waterproofing, after which the floor of the house is equipped.
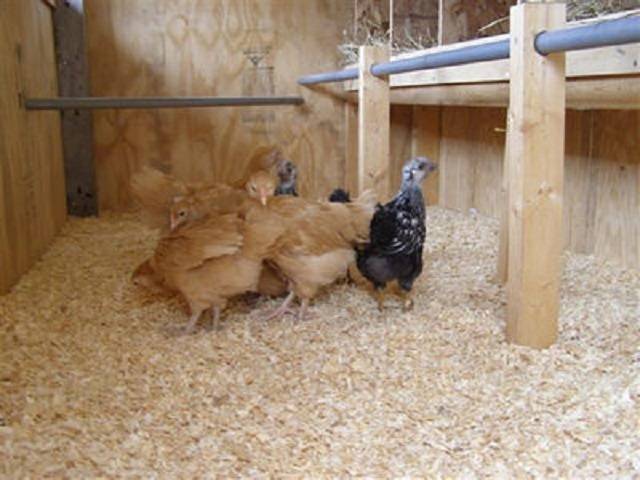
In the future, when the chicken coop is completely ready, the floor is covered with temporary flooring. For this, it is better to use sand or sawdust. Small straw or hay is fine, but will need to be changed frequently. Such a flooring gets wet quickly, after which it begins to rot. Hay or straw is scattered on the floor of the house in a thin layer, and after two days they are replaced. It is sawdust that is best perceived by chickens, and they need to be preferred.
Building the walls of the poultry house
The technology for erecting walls depends on what kind of device the chicken coop is, that is, whether it is stone or wooden. Wood walls will help to keep the heat inside the house optimally. To do this, use a simple edged board, lining, plywood or OSB sheets.
We build wooden walls in the chicken coop using frame technology. To do this, we assemble the skeleton of a barn from a bar with a section of 100x100 mm.First, we knock down the lower frame, we attach the racks to it, which we connect from above with a strapping from a bar.
The frame completely forms the skeleton of the future chicken coop, so you need to accurately withstand all dimensions. At this stage, we provide openings for windows and doors. We cover the finished frame of the poultry house with a vapor barrier from the outside, after which we carry out the sheathing.
Inside the structure, cells were formed between the frame posts. Here you need to lay insulation, close it with a vapor barrier, and now you can make the inner lining of the chicken coop.
Red or silicate bricks are best suited for stone walls in the house. But such a chicken coop will turn out to be very cold, and in winter it will require large expenses for heating... The stone walls of the house will have to be insulated from the inside or outside. For these purposes, the same foam or mineral wool will go.
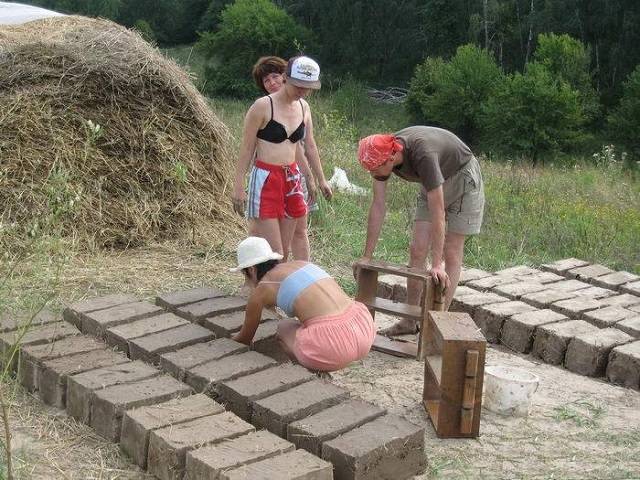
In rural areas, building material for a chicken coop can be made by hand. If you put the mixed clay and straw in rectangular shapes, you get adobe. After drying in the sun, the blocks will be ready for laying out the walls. But such a chicken coop should not be left in the rain, otherwise the clay will simply turn sour. The adobe walls of the poultry house must be sheathed from the outside with any cladding, and they will also have to be insulated.
Whatever the walls of the chicken coop are made of, they should not let cold and dampness into the room. The inside of the house must be whitewashed with lime. She will save the walls from the spread of the fungus.
Construction of the roof and ceiling of the poultry house
Two types of roofs are installed on chicken coops:
- The most effective is the gable design. Firstly, such a roof forms an attic room on the hen house, which allows you to store various equipment. The air space between the ceiling and the roof serves as additional insulation for the house. Secondly, less precipitation accumulates on the gable roof, which reduces the likelihood of leaks. It is better to install such a structure on large poultry houses measuring 4x4 m.To make a gable roof from a bar, triangular rafters are knocked down, after which they are attached to the upper strapping of the shed frame.
- On small chicken coops, it makes no sense to suffer with a complex roof. It is easier to build a single-slope structure here. The slope is made in the opposite direction from the entrance so that rainwater does not drain from the roof near the doors of the house.
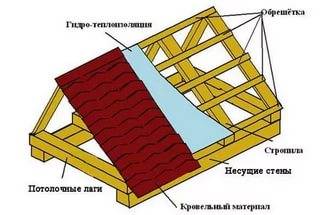
Any roofing material for the roof of the chicken coop is suitable. Most often, roofing material or corrugated board is used for poultry houses. In the past, asbestos-cement slate was popular, but the heavy weight of the roofing material requires reinforcement of the house walls. The roof of the chicken coop must be insulated. To do this, mineral wool is laid between the rafter legs under the counter-lattice. Thermal insulation from wooden elements, as well as roofs, are closed with steam and waterproofing.
Despite the fact that the roof of the chicken coop is insulated, the ceiling still needs to be knocked out inside. To do this, plywood or OSB is nailed to the floor beams from below. Styrofoam or mineral wool is placed on top of the sheathing, after which the top sheathing is nailed. In principle, it may not be necessary to fasten it, but this option is suitable for a pitched roof of a chicken coop. The gable structure of the poultry house forms an attic room, and the upper sheathing will play the role of the floor, protecting the insulation from damage.
Poultry ventilation
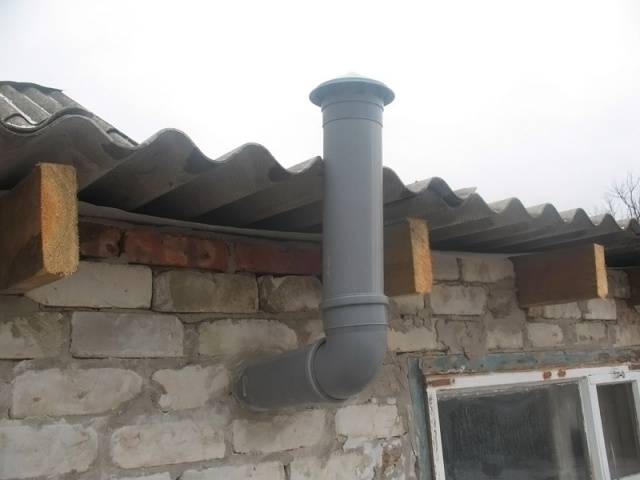
Any farm building for keeping poultry or animals is equipped with ventilation. In a home chicken coop, two air ducts are usually installed. They are made from a plastic pipe with a diameter of 100 mm or knock down a square box from a board. The air ducts are placed evenly over the coop.
Natural ventilation of the poultry house consists of an inlet and an exhaust pipe. The first is taken out above the roof by 40 cm, and the second - by 1.5 m. To prevent precipitation from entering the chicken coop through the air ducts, they put on the heads on top.For convenience, ventilation pipes must be equipped with dampers to regulate the air flow.
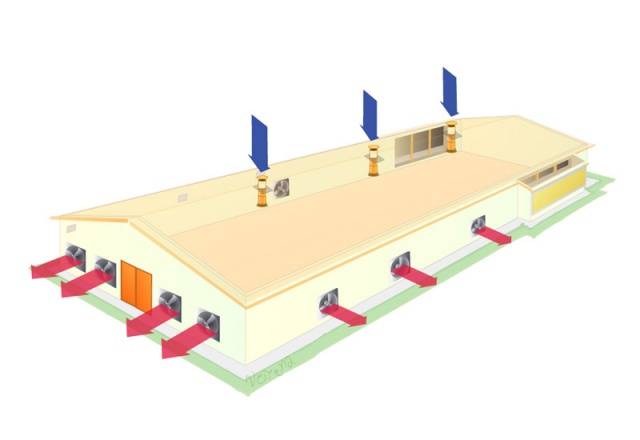
In a large poultry house, it makes sense to install forced ventilation. Such a system provides for the use of electric fans together with air ducts.
Making nests and perches for chickens
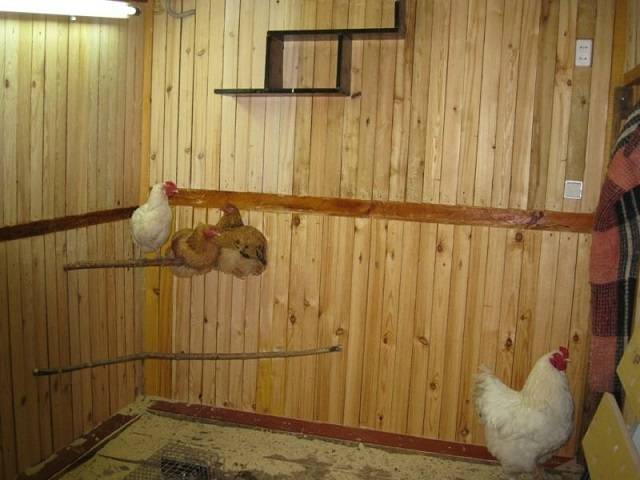
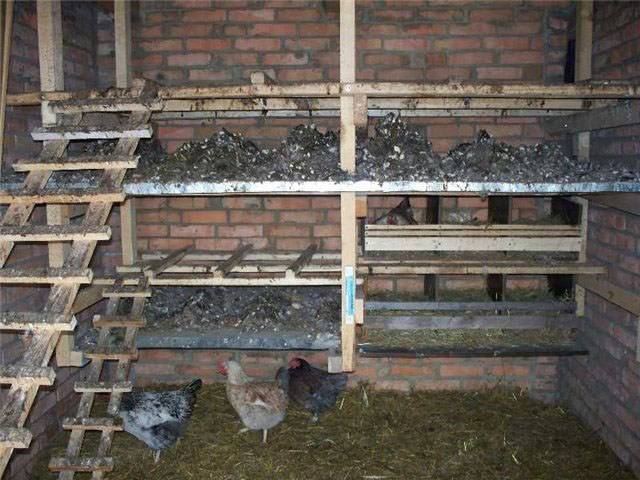
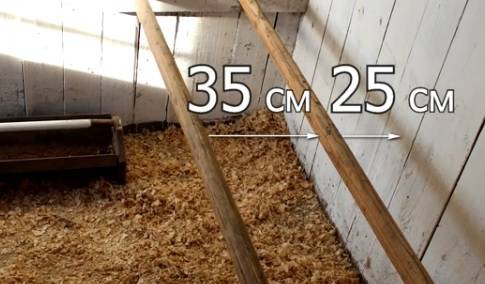
A chicken roost is like a sofa for a human. They must be comfortable and reliable. Perches are made of timber with a section of 40x50 or 50x60 mm. The edges of the poles are rounded so that it is convenient for the chickens to wrap their paws around them. The roost in the chicken coop is set horizontally. The poles are placed parallel to the floors at a height of 50 cm.
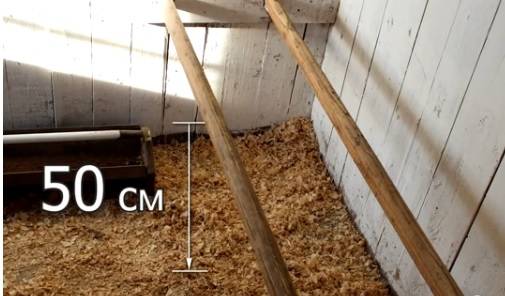
The first pole from the wall is fixed at a distance of 25 cm, and all subsequent ones - after 35 cm.
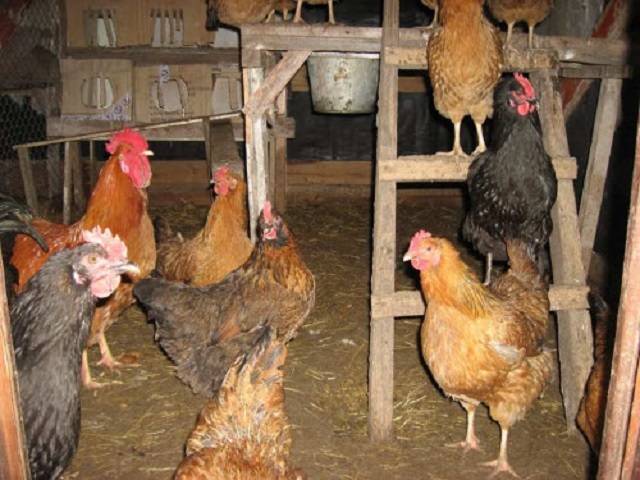
If there is not enough space in the hen house, the perches are installed vertically at an angle. It turns out a kind of ladder of poles in several tiers. The total length of perches depends on the number of livestock. One chicken is given 30 cm of free space on the pole.
Nests for layers made from boxes or knocked down plywood partitions. They are placed in a dark place in the house. Usually at least 10 nests are made for 20 layers.
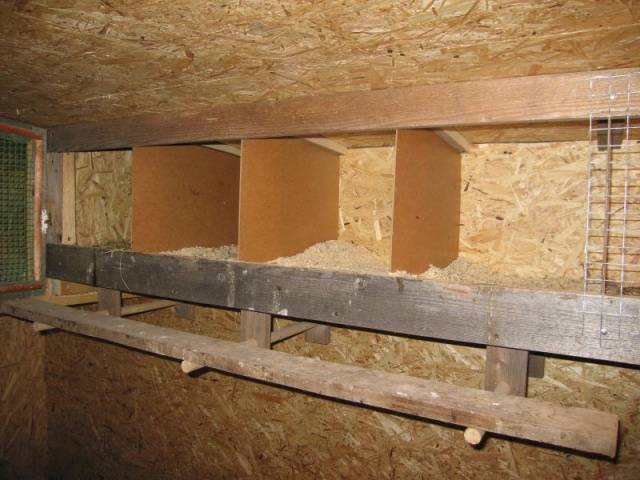
The size of the nest is selected according to the breed of chickens. Layers are usually small. For them, a nest depth of 40 cm is enough, and the width and height are kept within 30 cm. The bottom must be covered with sawdust, hay or straw. It is more comfortable for the chicken to sit on the bedding, and the eggs will not break on the wooden bottom.

The video tells about the device of the chicken coop:
Experienced poultry farmers are serious about arranging a poultry house. For chickens, automatic drinkers, feeders are installed, sensors with regulators are connected to lighting and heating devices. This allows you to visit the chicken coop a couple of times a week to add a new portion of feed and pick up the laid eggs.


