Content
- 1 When to plant spring garlic outdoors in spring
- 2 Is it possible to plant sprouted spring garlic
- 3 Growing and caring for spring garlic
- 3.1 How to germinate spring garlic before planting
- 3.2 What to soak and how to prepare spring garlic for planting in spring
- 3.3 Where is it better to plant garlic
- 3.4 Preparing the soil for planting spring garlic
- 3.5 At what distance and at what depth to plant spring garlic
- 3.6 How to properly plant spring garlic in spring
- 4 Is it possible to plant spring garlic in the fall before winter
- 5 Secrets of growing spring garlic
- 6 Conclusion
Planting spring garlic in open ground in spring is carried out towards the end of April or early May. By this time, the soil should warm up to 3-5 ° C. At the same time, there is no need to delay the time, since garlic prefers to grow in cool conditions.
When to plant spring garlic outdoors in spring
Spring garlic ripens much faster than winter garlic, so it is planted in spring. Main criteria:
- The snow has completely melted, the soil thawed.
- The top layer of the soil had time to dry out, which is easy to determine on your own. You need to take a lump, squeeze it and throw it from a small height - the earth should crumble into small fragments.
- The main reference point is that the soil should have time to warm up to a temperature of 3-5 ° C.
It should be borne in mind that the root system of spring garlic develops at low temperatures (5–10 ° C), so there is no need to delay planting it.
The plant must have time to take root and give not only roots, but also the first leaves - this directly affects the size of the bulb, that is, on the yield. Usually, a suitable temperature regime is observed already in mid-April. The specific dates of planting are determined by the climatic features of the region.
When to plant spring garlic in the Urals
Sowing of spring garlic in the Urals is carried out in the last month of spring. The soil and air have time to warm up to an acceptable temperature only by mid-May. If April was relatively warm, for 10 days in a row the daytime temperature was kept at around + 14-15 ° C and above, then planting can be done earlier - in early May.
When to plant spring garlic in Siberia
In Siberia, it is also necessary to plant spring garlic with cloves at the end of spring. Usually, the dates are slightly shifted (compared to the Urals) and fall on the second half of May. If April was relatively warm, you can start the procedure after the May holidays, in the second decade of the month.
Dates of planting spring garlic in the spring in the Moscow region
In the Moscow region, the climatic conditions are slightly milder. And although recurrent frosts are not excluded, this should not be feared: the plant is not afraid of a short-term cooling down to 1-3 ° C on the soil. The optimal planting time for spring garlic is the second half of April. Sometimes the deadline is postponed to the beginning of May. To make sure it is ready, you need to measure the temperature of the soil with a thermometer.
The right time for planting spring garlic in the Moscow region and the middle lane is the second half of April
Planting dates for spring garlic in the middle lane, Leningrad region
The planting time for spring garlic in the middle lane is the same as in the Moscow region, that is, the third decade of April or the beginning of May. As for the Leningrad region and other regions of the North-West of Russia, here the dates are later, closer to the Urals. The soil has time to warm up to the desired temperature by the last days of April, although it often happens that you have to wait until the first ten days of May.
Lunar landing dates
When planting spring garlic, summer residents pay attention to the lunar calendar. It is advisable to plant all root crops in the waning moon. The days of the full moon and new moon are traditionally considered unfavorable. If you can't plan the procedure for a specific day, you need to take into account these rules for planting spring garlic.
Is it possible to plant sprouted spring garlic
If the garlic has sprouted, it can still be planted. But not in open ground (even if the temperature is optimal), but in an ordinary flower pot or any containers for seedlings - individual cups, common boxes or containers. The sequence of actions is as follows:
- Carefully cut off dry roots, trying not to damage the bottom itself.
- The spring garlic bulbs are divided into cloves, only some of them need to be planted, and others (rotten and dried out) should be discarded.
- Immerse healthy material in a weak (pink) solution of potassium permanganate 0.7-0.8% for 3-4 hours.
- Planted in a shallow container with fertile soil (layer 2-3 cm) so that the cloves fit snugly together.
- Water abundantly 2-3 times a week. Grown at room temperature.
Two weeks after planting, green arrows of spring garlic will appear. They are very tender, tasty and healthy, because they contain vitamins A, C, group B, phytoncides, organic acids.
The mixture is placed in a jar with a lid and stored in the refrigerator for several months.
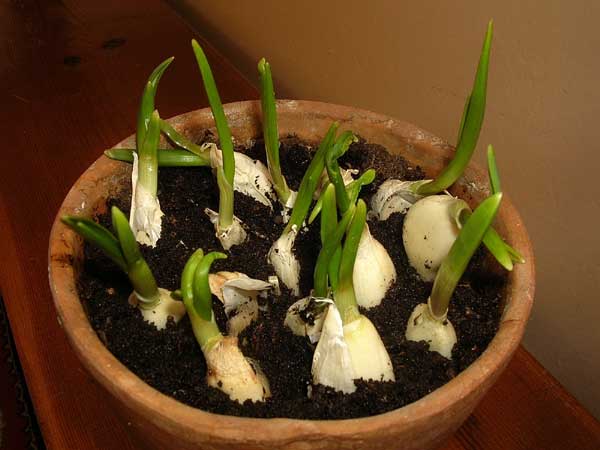
Sprouted garlic that gives green arrows is best grown at home
Growing and caring for spring garlic
It is not difficult to care for this culture. It is only important to process the spring garlic before planting in the spring, and also to provide an interval between neighboring plants. Before starting work, the seed must be divided into cloves, while:
- it is better to choose them from the first (outer) row;
- too small must be discarded;
- remove dried and rotten;
- remove accrete. They have clear signs of degeneration, so a good harvest from such cloves will not work.
How to germinate spring garlic before planting
The pre-planting material of spring garlic must be germinated a little, getting small roots 2 cm in size. To do this, it is enough to soak it first in potassium permanganate for several hours, and then in a growth stimulator for 30–40 minutes. After that, the teeth are wrapped in cheesecloth and put into the refrigerator. The roots begin to grow from the first days, and they reach the desired length in just a week.
What to soak and how to prepare spring garlic for planting in spring
Preparing spring garlic for planting in spring necessarily includes soaking. It takes place in 2 stages:
- First, the selected cloves are kept in a 1% solution of potassium permanganate (light pink) for 3-4 hours. This allows you to disinfect the surface and destroy both harmful fungi and bacteria.
- Also, before planting, spring garlic should be soaked in a growth stimulator, for example, in "Epin", "Kornevin", "Zircon", "NV-101".If these products are not at hand, you can get fresh aloe juice and dilute it with water in a 1: 1 ratio. The planting material is kept for 30-40 minutes.
After that, the solution is drained, and the wet cloves are placed in any natural fabric or gauze, rolled in several layers. Wrapped and placed in a sturdy bag that does not need to be tied tightly. Then this bundle is sent to the refrigerator (compartment for fruits and vegetables), and on the right day it is taken and planted. If possible, planting can be done immediately after soaking.
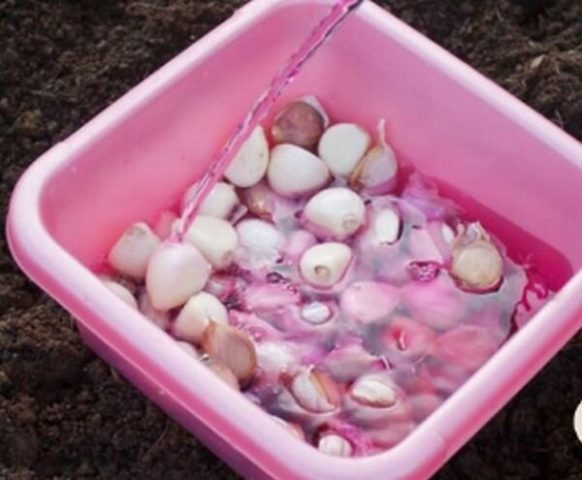
Disinfection of planting material in potassium permanganate is carried out for several hours
Where is it better to plant garlic
There are no special requirements for the place for growing spring garlic in the spring. Finding a suitable site is simple: it should be well lit (no shade from trees, shrubs or buildings) and be located on a small hill. Planting in lowlands where water accumulates is undesirable. In this case, the garden bed can be raised slightly by digging in the ground or by installing additional wooden fences.
If possible, it is better to cultivate the culture in those places where legumes, zucchini, pumpkin, oats, strawberries, strawberries or cucumbers previously grew.
You should not plant the cloves in those places where any root crops and nightshades were recently placed: tomato, potatoes, peppers, eggplant, radishes, carrots, beets, onions and others.
Preparing the soil for planting spring garlic
Garlic prefers fertile, light, loose soil - loam or black soil. It is advisable to prepare the site in the fall. To do this, it is cleaned, dug up and, if necessary, add 2-3 kg of humus or compost for each square meter.
You can also add 200-300 g of wood ash. Fresh manure should not be added, especially in spring. As it matures, it heats up the soil very much, so the roots of spring garlic can be seriously damaged during planting.
At what distance and at what depth to plant spring garlic
The scheme of planting spring garlic in open ground differs in that the cloves are 2 times closer than in winter. The fact is that the bulbs of the "summer" variety are much smaller, so you can save space.
When landing, you should observe:
- the interval between adjacent holes is 4–6 cm;
- depth - no more than 2-3 cm.
Experienced summer residents take measurements by eye. Novice hobbyists may be advised to define depth as the width of two fingers folded together. The interval between landings is approximately the length of the little finger.
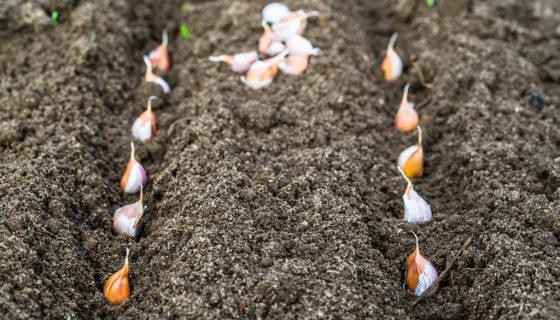
Classic planting pattern - 5 cm between adjacent teeth
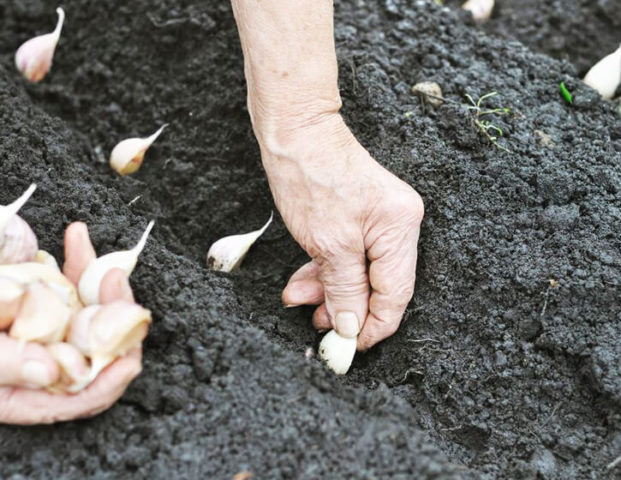
How to properly plant spring garlic in spring
After you have managed to properly prepare spring garlic for planting in spring, you can proceed to the main procedure. The sequence of actions is as follows:
- Several furrows are made on the prepared bed with an interval of 25-30 cm.
- They put vermicompost or granules of complex fertilizer in each of them (if additional fertilizing was not introduced in advance).
- The cloves are planted in the ground, deepening by 2-3 cm.
- Pour with settled water and mulch with sawdust, wood chips. This layer will allow the soil to stay moist for much longer and will also inhibit weed growth.
Is it possible to plant spring garlic in the fall before winter
Spring garlic can be planted before winter. In this case, the growing season will increase, and the heads will be much larger (from 70–80 to 100 g). The optimal time is the end of September. In the south, you can do it 1-2 weeks later, and in the Urals and Siberia - 7 days earlier.
Before starting work, spring garlic should be processed in the same way as for a classic planting in spring. However, there are two differences:
- The embedment depth will be greater: 5–8 cm instead of 2–3 cm.
- At the bottom of the hole, you need to put coarse white sand. Then stick in the cloves. Then again cover it with sand, and top it up with fertile soil.
The plantings are covered with a large layer of mulch. You can use dry foliage, straw, sawdust and other materials at hand.
Secrets of growing spring garlic
The agrotechnology of growing spring garlic is not very complicated, but it has its own nuances. Experienced summer residents who receive good harvests of this culture are advised to adhere to the following rules:
- During May and June, they give abundant watering (2 times a week), then weekly (if there is no rain). As soon as 5–6 sheets appear, the volume of water is reduced, and at the end of July, it is completely stopped.
- Particular attention is paid to loosening. It is carried out 1-2 days after each watering.
- Weeding is also done regularly. There should be no weeds in the spring garlic bed.
- If the soil has already been fertilized before planting, additional fertilizing is not necessary. If the soil is not very fertile, you can give urea or a complex fertilizer, for example, azofosk, once (in May).
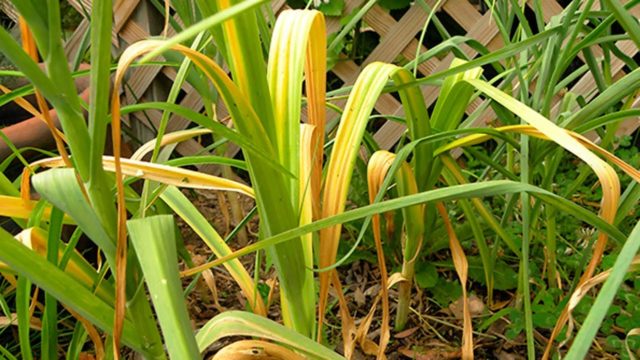
Excessive dressing can cause yellowing of the leaves.
Conclusion
Planting spring garlic outdoors in spring is not very difficult. Both measuring soil temperature and observing other plants will help determine the timing. The algorithm is quite simple: the cloves are deepened by 2-3 cm, leaving a distance of 4-6 cm between them. To learn when and how to plant spring garlic in spring, you can watch the video.


