Content
Reading and looking through the reviews about the F1 Passport melon, most gardeners set themselves the goal of planting this particular variety on their site. The popularity of the hybrid is due to the large number of positive reviews about the melon Passport.

Melon Description Passport F1
The appearance of the hybrid was facilitated by the scientific work of breeders of the American company HOLLAR SEEDS, which began at the beginning of this century (2000). Test cultivation showed the consistency of the Passport F1 melon hybrid, and already in January 2002 an application was submitted to the State Breeding Commission of the Russian Federation.
The characteristics stated in the letter were noted by Russian specialists, and after 2 years the melon Passport F1 took its rightful place in the Register of approved seeds. The hybrid is zoned in the North Caucasus region.
Melon Passport F1 is an early maturing hybrid with a growing season of 55 to 75 days. During this time, the plant is able to form dense lashes with green, slightly dissected leaf plates of medium size.
A large number of female flowers are tied on long lashes, from which rounded fruits are subsequently formed. The surface of the Passport melon has a smooth structure with a distinct presence of a continuous mesh, there is no pattern on the surface of the "false berry", and a yellow color scheme with green tints prevails.
The average size of the seed nest determines the large amount of juicy and tender cream-colored flesh. When the fruit is cut, the color of the flesh, which is tightly attached to the bark, has a green tint. The skin (or bark) of a melon F1 Passport does not differ in great thickness, more falling under the definition of "medium".
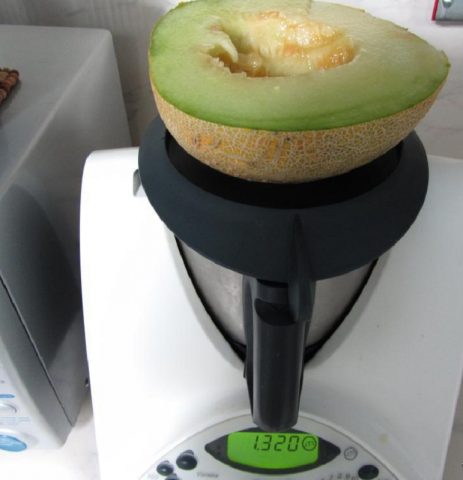
The hybrid is very productive, since the fruits are able to form in 85% of the total number of ovaries. "False berry", depending on the region and growing conditions, can reach a weight of up to 3 kg.
When grown by rainfed farming (cultivation with insufficient watering) from 10 m2 you can get 18 kg of tasty and aromatic fruits. Growing melon F1 Passport using irrigation technique, yield on the same 10 m2 will be up to 40 kg.
Melon hybrid Passport F1 has high taste. The use of fruits is possible both fresh and processed. Delicious desserts are obtained from the fragrant pulp of Passport melon:
- cocktails;
- smoothies;
- fruit salads;
- ice cream;
- jam;
- candied fruit;
- jams.
Pros and cons of the variety
Melon hybrid F1 Passport has gained great popularity for its many positive qualities:
- Early ripening.
- Productivity.
- Unpretentiousness.
- Versatility of use.
- Taste qualities.
- Resistant to most fungal diseases.
Most gardeners consider the disadvantages of this hybrid are the short shelf life of ripe fruits, no more than 7 days after harvest, and the inability to collect their own seeds.
Melon Passport is a first generation hybrid. When collecting seeds for planting next season, do not expect the same fruit in the second generation. Large, but only male flowers will appear on the lashes.
Melon Growing Passport
You can grow a melon F1 Passport in 2 ways:
- Outdoor planting.
- Growing fruits in greenhouses and greenhouses.
Melon can be grown either as a seedling or seedling method.All steps required for seed preparation will be the same for both options.
Seedling preparation
In order to prepare for planting seedlings, you need to perform several sequential steps:
- Purchase of planting material (seeds) and a universal soil substrate.
- Soaking melon seeds in a solution of epin or zircon - 2 drops of the drug per 100 ml of water. The seeds are in solution for at least 4 hours.
- Placing seeds for pecking. This process is carried out using moistened gauze, on one part of which the seeds are spread, and the other part is covered.
- Preparation and processing of growing containers. At this stage, the containers are treated with a strong solution of potassium permanganate.
After completing all the steps in sequence, in the third decade of April, you can start planting melon seeds for seedlings.
When planting, melon seeds must be deepened 2 cm into the soil substrate. No more than 3 seeds are placed in one container, after which watering is carried out.
After planting from above, it is necessary to sprinkle the soil with sand - this will allow in the future to avoid infection with a black leg.
The containers with future sprouts are placed on a common pallet, with the help of which subsequent watering will be carried out.
Covering the container on top with plastic wrap or glass, the pallet must be placed in a warm place. When the first shoots appear, the seedlings need a lot of light and heat. The best option would be to place containers on the windowsills of the southern windows. Covering material must be removed.
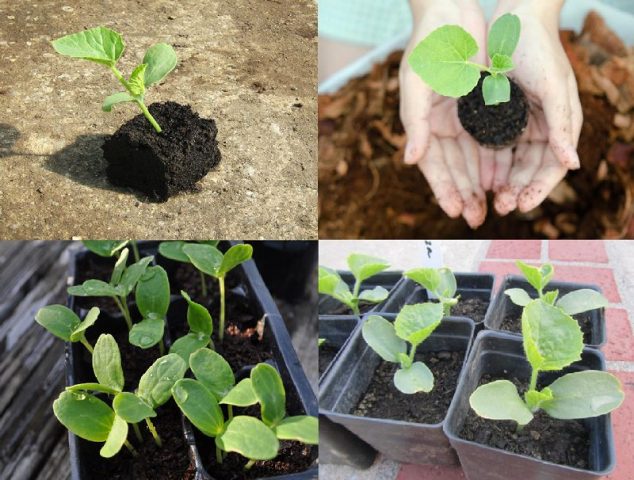
The subsequent care of the seedlings will not be difficult and will not take much time. By following the step-by-step instructions, you can get strong and healthy seedlings:
- Only one seedling should be left in each container. The other two are removed by cutting to the very root.
- When the first true leaf appears, watering is carried out with warm, settled water into the pan. The sprouts are still very tender and direct contact with moisture is contraindicated for them.
- After the appearance of 3 pairs of true leaves, it is necessary to pinch the top of the seedling - this will give an incentive for the development of lateral shoots.
- It is necessary to feed the seedlings twice before transplanting to a permanent place. For this, complex mineral or specialized fertilizers for seedlings are suitable.
- Every 3-4 days it is necessary to loosen the top layer of the soil.
- 2 weeks before transplanting, melon seedlings Passport must undergo a hardening procedure. Within a week, it will be enough to slightly open the window to allow cold air to enter, and then you can take the containers out into the open air. To begin with, by 6 hours, with each subsequent day increasing the time of the seedlings staying on the street by 1 hour.
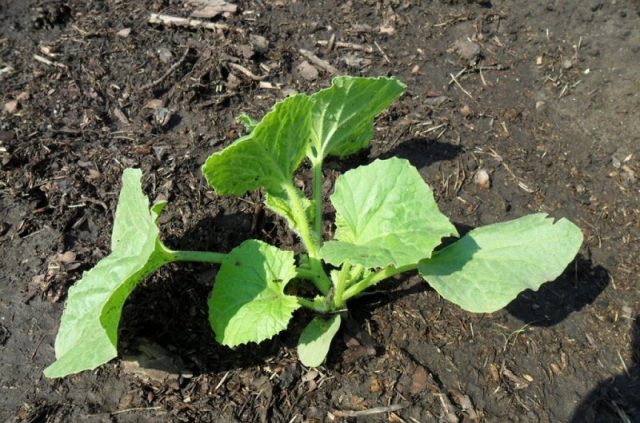
Carrying out all the actions will allow by the end of May to start transplanting annual melon seedlings, on which 6 real leaves will already appear, into open ground or into a greenhouse.
Selection and preparation of the landing site
Melon planting site Passport must be prepared in the fall. Important procedures for preparing the landing site:
- Digging soil onto a shovel bayonet.
- Removal of weeds and fallen leaves.
- Adding humus or manure - up to 5 kg per 1 m2.
- Sowing of siderata herbs - mustard, oats, vetch, lupine.
The best place in the garden for melons will be the plots where last season were planted:
- Luke;
- garlic;
- cabbage;
- legumes - peas, beans, beans;
- corn;
- spicy and medicinal herbs;
- radish and daikon.
In early spring, it is necessary to dig up the site, with the obligatory embedding of green manure seedlings into the ground. The beds are formed in the form of mounds of hills with an obligatory distance of 80 cm between them.After the beds are formed, you need to cover them with non-woven material for better heating.
Landing rules
The best way to plant the Passport melon in open field conditions is to arrange the shoots in one line at a distance of 100 cm from each other. This arrangement will allow for the development of a good root system in the future.
When planting melon seedlings Passport in a greenhouse for 1 m2 you will need to plant 2 seedlings.
The most important criterion for the correct planting of melon seedlings Passport will be the elevation of the root collar by 7 cm from the ground level.
Watering and feeding
Melon requires frequent watering only during the growth of green lashes. Watering must be carried out only with warm water strictly at the root. Moisture on the whips and leaves can cause fungal diseases.
It is necessary to feed the plant every 14 days. To prepare fertilizers, add and dilute in 10 liters of water:
- ammonium nitrate - 25 g;
- superphosphate - 50 g;
- potassium sulfate - 15 g.
For the entire growing season, melon seedlings will need 3 feeding with a solution of potassium monophosphate (15 g of the drug per 10 l of water). This will improve the taste and increase the sugar content in the fruit.
Formation
Depending on the place where the melon is grown, the formation of lashes will also take place.
When planting seedlings in the greenhouse, a maximum of two stems must be left, while all emerging stepchildren below 50 cm from the ground level must be removed. Shoots that begin to appear above the 50 cm mark must be pinched. An important condition for the successful cultivation of melons in the greenhouse will be the equipment of trellises that will hold the whips during the beginning of the formation of ripening of the fruit.
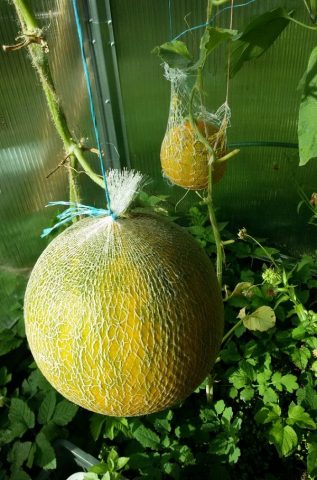
Ripening melons can break whips, which is why many growers use the netting method. In the photo, you can consider this method more closely. Be sure to tie the mesh bags to the crossbeams of the greenhouse. This will protect the melon stems from damage.
When growing melons outdoors, stem formation is not required. If, during the appearance of peduncles, no more than 5 flowers are left on the lashes, then later the fruits will be more weighty. The use of this method, judging from the reviews of gardeners, made it possible to obtain a melon weighing up to 4 kg.
Harvesting
Full ripening of the first fruits occurs towards the end of July or the beginning of August. The duration of fruiting in the Passport melon is possible until the end of September, subject to stable and warm weather.
Diseases and pests
Melon Passport F1 is resistant to many fungal diseases, including fusarium wilt and anthracnose. If any foci of fungal infections occur, a solution of potassium permanganate will come to the aid of the gardener. To prepare it, you will need 1.5 g of the drug and a bucket of water at room temperature. Before processing, it is necessary to remove the affected leaf plates.
The most common pests that can harm melon seedlings are:
- melon fly;
- melon aphid;
- spider mite.
For pest control, it is best to use insecticidal preparations. Aktara, Confidor, Aktellik, Mospilan, Talstar are the most popular drugs among gardeners.
Melon Reviews Passport
Conclusion
Numerous reviews about the melon Passport F1 make it possible to say with confidence that the popularity of the variety is gaining momentum not only in the southern latitudes, but also in the regions of risky farming. And this is possible only due to the early ripening period, and there is no need to talk about the taste and versatility of use. If you have the opportunity and desire, then it is better to grow a melon yourself and check everything on your own experience.


