Content
Amazing beauty is obtained when bright colors stand out against the background of plant greenery. You can achieve this effect on the site in various ways. One of the types of colorful creativity, which is becoming more and more popular, can be called drawings on stones with acrylic paints. For those who see such a design for the first time, it seems that it is simply impossible to make such masterpieces with your own hands.

In fact, even those who have no experience with brushes and paints can paint stones. An example is small children. With a brush and several paint colors, they create unique, bold designs that are admirable.
To get the same result, let's try to consider in detail this cheap way to decorate a summer cottage or garden.
First of all, it is useful for novice artists to familiarize themselves with the main stages of painting. This includes:
- Selection of material... The main material for painting, of course, is stone.
- Sketching... This step is a must for beginners. Those who are confident in their creative powers can safely do without a sketch. But in order for the drawing on the stone to be clear, it is better to draw it.
- Choosing a colorful palette and brushes... Color is very important in creating designs on stones, because the texture and surface can be different. Therefore, you will have to choose color solutions based on the properties of the stones, and not only according to the intended ornament.
- Pinning the pattern.
By clearly following this sequence, you can be sure that you will be able not only to avoid mistakes, but also to create bright patterns.
Beginning artists have a lot of questions, so each of them needs to be given due attention.
Tools and materials
What stones are suitable for painting with paints? It is best to paint on smooth, flat stones.
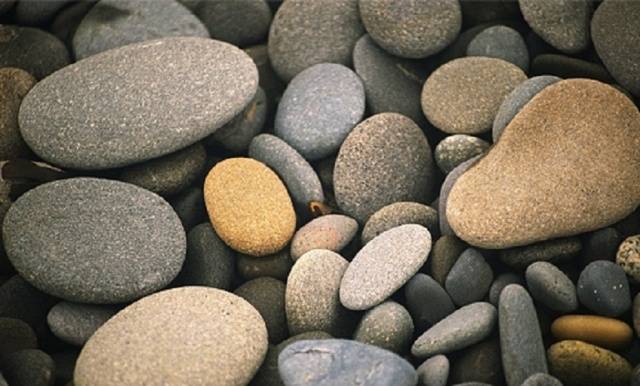
Sea pebbles are perfect for drawing, but if it is far from the sea, then you can choose a suitable material in the surrounding landscape.
Having carefully looked at ordinary cobblestones and small stones, sometimes you immediately get to see the plot of the future painting. The main thing is that the selected stone is smooth and has a dense structure. Porous stones require a lot of paint, they just absorb it. But, if a piece of cheese is conceived in the exposition, then a porous stone is a good choice. Hardly rolled stones or stones with sharp edges will not work. It is difficult to draw on them. You should not take very dark cobblestones either.
What should be done with the selected material? First, wash well and dry well. After all, the chosen stone is often very dirty.
While the stone is drying, we prepare the paints. Those who are already engaged in such creativity paint with various colors - watercolors, gouache, acrylics. Experienced artists work with acrylic paints. Beginners are also advised to try this option.
Acrylic paints are available in a bright full palette, they fit well on the surface of the stone, even without a primer. Another advantage is that they dry quickly. Although, especially for beginners, this factor will have to be taken into account all the time in work.
Be sure to take precautions for your clothes, otherwise one drop can make it look very "home". When working with stones, a small amount of paints should be placed on the palette. The surface of the stone is small, so excess paint will dry out quickly.Acrylic paints are more expensive than others, but their quality for painting fully justifies the cost.
To paint with paints on stones, you need brushes. You will need brushes of different widths.

In some moments, a toothpick comes in handy. Large brushes are needed to paint over the background, and thin ones will help to paint various small details and strokes. When working with acrylic paints, it is necessary to ensure that the brush does not have time to dry. For this, it is often placed in water. And when you change the tone or color in the painting, they wash well and dry them dry. Otherwise, the brush very quickly turns into a scraper, which will not work further.
In the list of materials, we include a simple pencil for sketching a sketch on a stone. The second addition will be a thinner and a cotton swab. They will be needed in case of corrections. Transparent varnish - for fixing the pattern, and also PVA primer or glue.
Themes for creativity
It is often very difficult for a novice artist to decide on the theme of the composition. There is a desire, time and colors, but there is much less confidence that it will turn out. Let's consider some examples of painting on stones that even a beginner can do. It will turn out very worthy.
Ornaments and geometric patterns
The most advantageous option.
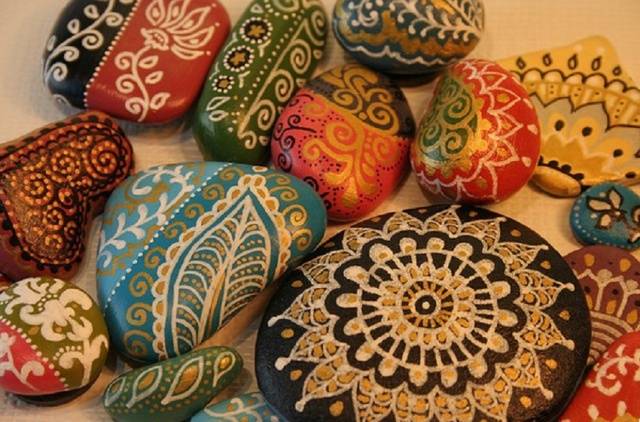
Even with any inaccuracies or "punctures" with paints, such drawings on the stones look very catchy. They can simply be spread out among the grass on the lawn or between stones. It is very important to choose the brightest colors and a large number of colors for such fantasies. The richer, the more beautiful the pattern will be.
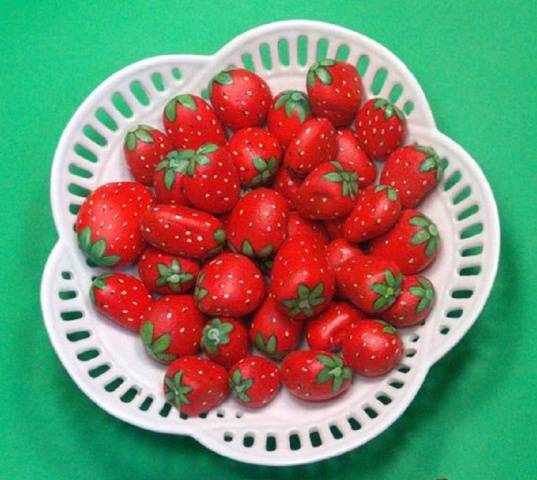
Fruits and berries
In this case, there are always natural "sitters" at hand. You can copy paints and reliefs from your crop. For example, strawberry:
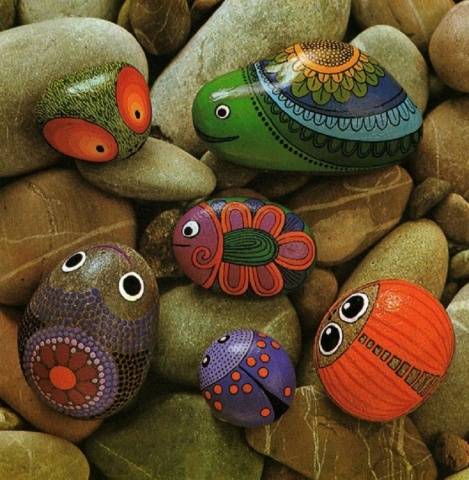
Insects, birds, animals, fish
For those who doubt their talents, it will be enough to view educational photos or videos for children. It is very good to do this with your children. Painting on a stone with acrylic paints will become more fun and useful.

Children, even without a textbook, will willingly draw a ladybug, a turtle, a worm.
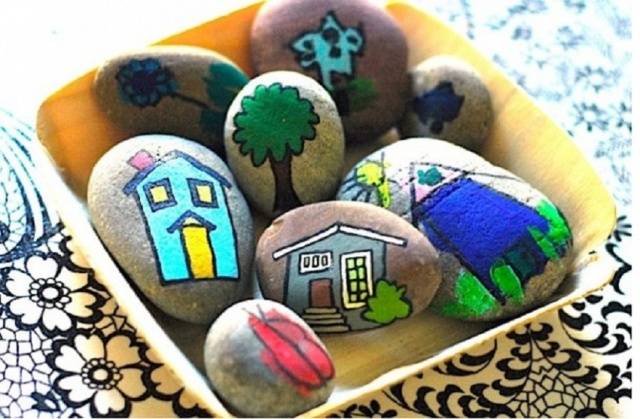
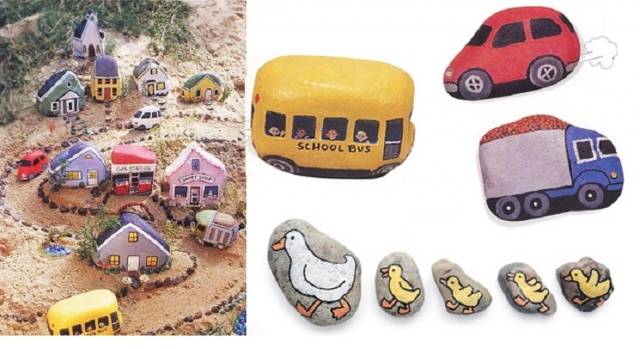
Fairy houses
These stones can be of any size and color. Children love to play with houses, they perfectly decorate the lawn and garden path.
Any theme will do if you are just learning how to paint stones with acrylics. Even not the most successful works look great on the lawn, in the rock garden, in garden compositions.
Pebbles for the game
This category includes pebble dominoes
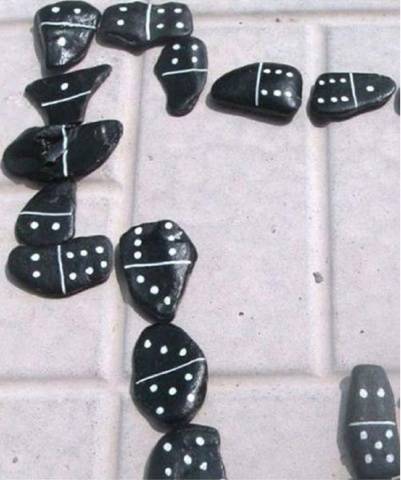
figurines for children's games and stones with thematic drawings.
Let's start drawing
Well washed, cleaned and degreased stone is ready for further operations. Experienced artists advise beginners to apply a primer before painting. Sometimes it is successfully replaced with a mixture of PVA glue and white paint. This will hide some of the unevenness in the background and make the picture look brighter. After re-drying, the stone is ready for sketching.
First, the background color for painting is applied, and then they begin to draw. For this operation, it is better for novice artists to take a simple pencil. Draw all the details, checking with the drawing on paper. Then the sketch is made out with paints. Any mistake can be corrected with a thinner and a cotton swab. And, sometimes, a jagged line gives a distinctive flavor to your masterpiece.
As soon as the acrylic paint dries well, the stone is covered with acrylic varnish. If the pattern is not located on the entire surface of the stone, then the rest of the part can be left untreated.
The completion of the work on decorating the stone with acrylic paints gives room for the manifestation of the next stage of creativity. How to apply painted pebbles? The first creative attempts usually remain on the owner's site. And then, when the hand has become more confident, you can make wonderful gifts to your friends and family:
- Fridge magnet... A magnet is glued onto a flat pebble with a beautiful pattern and decorates the interior of the kitchen.
- Souvenirs... Glass containers - a jug, a beautiful glass are perfect for creating a colorful composition. Painted stones can be matched by tone or theme, or you can connect the "incompatible".
- Children's sets... There are no restrictions at all here. A car park, a zoo, flora and fauna can not only entertain kids, but also serve as educational material.
With a lack of suitable material, many find a simple way out. Stones for painting with acrylic paints are very easy to create with your own hands. For this you will need:
- Basin or bucket... A little water is poured into it.
- Sand... Pour into a container to the level of the filled water. The sand should be well saturated with water, but there should be no water on its surface. A depression of the desired shape is made in the sand.
- Polyethylene... With its help, the prepared form is lined.
- Cement mortar... Prepared according to the usual recipe and poured into a depression. The top is closed with polyethylene and sprinkled with a layer of sand.
After complete drying, your stone is ready for painting with acrylic paints. The drawing technology does not differ from the classical one.
If desired, a dye of the desired shade is added to the cement. This will create a natural background for the painting. With such compositions, the site will become much brighter and more comfortable.
To help novice masters:


