Content
It is not very easy to assemble a cultivator from old spare parts. Adjustment of parts is required to make a workable assembly from them. If a person's hands grow from the right place, then it will not be difficult for him to make a homemade motor-cultivator.
Varieties of motor cultivators
Before you start assembling your motor-cultivator, you need to familiarize yourself with the varieties of equipment. It will depend on which nodes the homemade product will consist of and what tasks it can perform.
The difference between cultivators by engine type
On homemade cultivators, you can use two types of motors:
-
The electric motor is installed subject to the availability of a three-phase network. This technique is more suitable for small summer cottages, since a cable will constantly be dragged behind the cultivator, and you cannot go long distances with it. An electric motor is used with a power of at least 2 kW.

-
The best option is a cultivator with an internal combustion engine. The technique will turn out to be completely not tied to the outlet. You can go far into the field or carry loads. Motors are gasoline and diesel. If you can find an engine with a capacity of more than 4 liters. with., then from a homemade product you will get an excellent walk-behind tractor.

Having decided on the type of motor, you can start thinking about the design and functionality of the future cultivator.
The difference between motor cultivators by the method of movement and soil cultivation
According to the method of movement, the technique is of two types:
- Self-propelled vehicles are equipped with a wheelset with a drive;
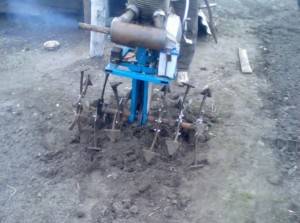
- Non-self-propelled cultivators have no driving wheels. Instead of them, working attachments, for example, milling cutters, are put on the rotating shaft. With the help of them, the unit threshes the soil and simultaneously moves forward.
Self-propelled vehicles are difficult to manufacture. Even 2 gearboxes can be installed here. One of them is using the expressway. It is needed to rotate the rotary nozzle, which loosens the earth. With the help of the second gearbox, the drive wheels are set in motion.
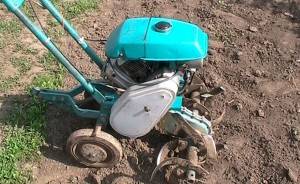
Non-self-propelled cultivators have the simplest device. The movement takes place due to the rotation of the cutters. The unit has two wheels, but they are not driving, but simply serve as a stop for simplified movement. In general, a motor cultivator cannot be made without support wheels. It will constantly bury itself in the ground. In addition, support wheels help regulate the depth of cultivation.
If you have already decided to assemble a motor-cultivator with your own hands, then it is better to spend more time on making a model with driving wheels.
What you need to assemble a motor cultivator
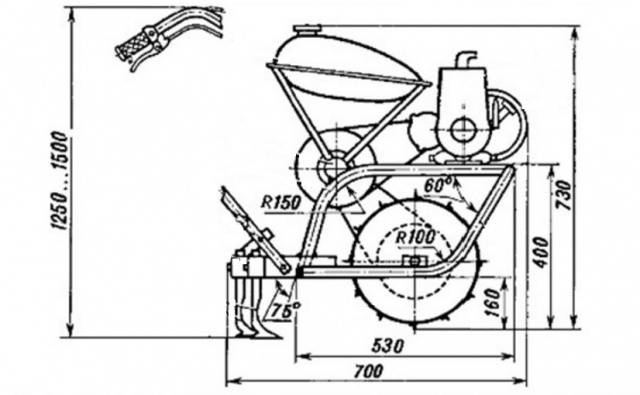
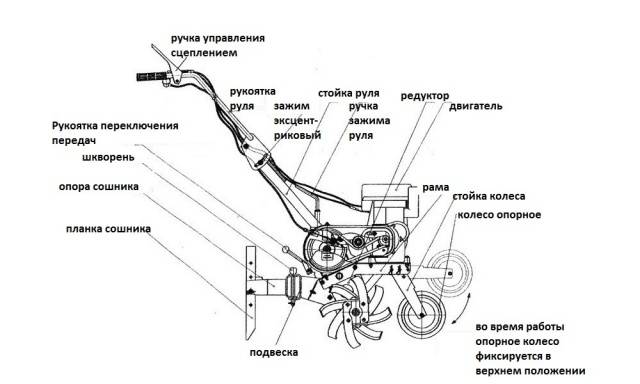
To assemble a cultivator yourself, you will need drawings of all nodes. An example of a diagram with dimensions is shown in the photo. You can look for other cultivator drawings or develop it yourself.
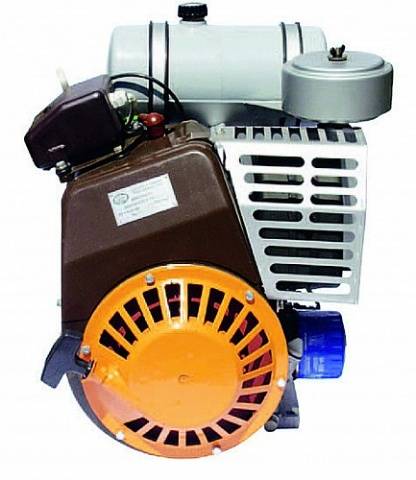
The internal combustion engine for a cultivator is suitable from a moped, a powerful chainsaw or a motorcycle.If it is decided to make an electrical installation, then the motor will fit from industrial ventilation or a compressor.
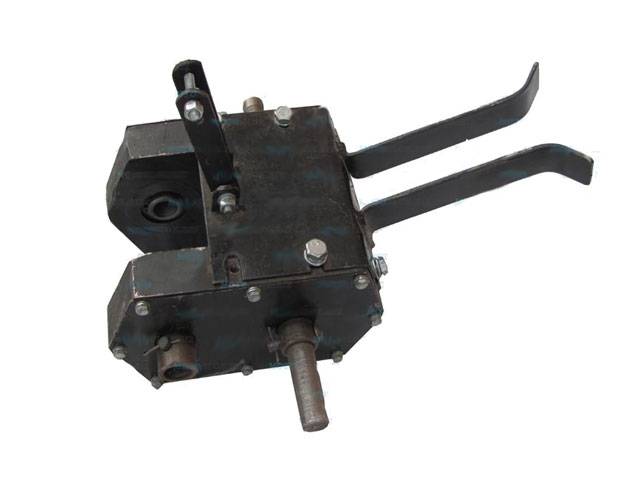
A reducer is needed for any type of cultivator. The engine speed is too high. The reducer reduces the speed, due to which the force of rotation of the working shaft increases.
All units of the cultivator are mounted on the frame, and the equipment is controlled by handles. These elements are welded from a pipe or profile. The structure must be solid. Excess weight is not a hindrance. From this only there will be the best coupling of the wheels of the cultivator with the ground.
Assembling an electric cultivator
If you could not find a powerful electric motor, you can take 2 pieces of 1.5 kW each. After fixing on the bed, they are combined with belts into a single system. Only then is a double-ribbed pulley installed on one engine. From it, the torque will be transmitted to the pulley of the working shaft of the cultivator gearbox.
The rear wheels are stubborn. They are simply attached to the frame with a bearing axle. The cultivator is driven by the front axle. Cutters are put on here, transport wheels or lugs are placed.
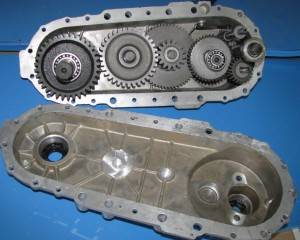
The gearbox is perfect for a broken Neva walk-behind tractor. Before use, it must be disassembled to inspect the gears. Parts with broken teeth must be replaced.
The frame of the cultivator is welded from a regular steel pipe with a circular cross-section with a diameter of 32 mm. For pens, it is advisable to take a slightly thinner tube, with a diameter of about 20-25 mm. A mount for attachments must be welded to the rear frame. It can also be removed from a broken walk-behind tractor. Thrust wheels are suitable for agricultural equipment. Of the purchased materials, only a long wire is needed through which electricity will be supplied to the motors.
Assembling a cultivator with an internal combustion engine
So, a motor cultivator needs an air-cooled internal combustion engine. In our example, let's take a model D 8 from an old moped. The photo shows a diagram of the cultivator. It can be used to determine the location of all nodes.
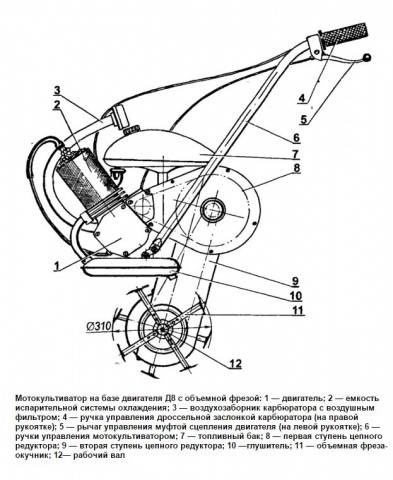
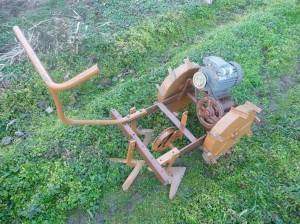
Assembling the cultivator has almost the same steps that were taken in the case of using an electric motor. First, a frame with handles is made, and then the motor is mounted. It is designed for air cooling, but the cultivator is running at low speed and this is not enough. A fan must be installed in front of the engine or a metal water tank must be equipped around the working cylinder. The device is primitive, but it will not let the cylinder block overheat.
The reducer for this motor-cultivator is used with a chain with two stages. The asterisk is taken one from a moped, and the other is from a bicycle. All rotating mechanisms are covered with a steel casing.
The video shows the process of making a motor cultivator:
Application of a creeper for a cultivator
The creeper is needed to reduce the speed of the motor cultivator. Most often it is in demand when working with attachments. This unit is bought factory-made or made on its own. In general, it is easier to put larger diameter wheels on the cultivator to slow down the speed. If this option does not suit you, you can assemble a simple creeper:
- a box is assembled from steel sheets;
- inside, an axle with a fitted gear of a larger diameter is welded than on the drive shaft of the cultivator;
- the box is bolted to the frame;
- now it remains to tighten the chain by connecting the driven and driving gears.
At this point, the creeper is ready. You can put wheels, cutters and continue to work with a motor cultivator, but at a lower speed.
Troubleshooting a motor cultivator
It is not difficult to repair a motor cultivator with your own hands due to the simplicity of the design of the technique. Let's take a look at the most common problems and how to fix them:
- The cultivator motor does not start. This is usually due to the lack of a spark. You need to try to replace the candle.Another problem can be the lack of fuel supply due to clogged filters. They are disassembled, washed in gasoline, and then put in place.
- The motor stalls during operation. The cause may again be spark plugs or poor fuel supply.
- Extraneous knocking inside the engine indicates damage to one of the parts. The motor urgently needs to be disassembled to identify a malfunction, otherwise it will jam.
- A running engine hums a lot and overheats. This could be due to a poor fuel mixture or a suspended load while working with the cultivator. The equipment is allowed to cool down, and during this time new fuel is prepared.
- The cultivator does not run. There may be something stuck between the cutters or wheels. Alternatively, the belt drive has weakened. If no such problems are found, then the problem is in the gearbox.
The video tells about the repair work:
It is easier to repair a homemade motorized cartool, since all the units were assembled on their own. You know what they are made of. It is better to entrust a complex breakdown of factory-made equipment to the specialists of the service center.


